Integrations & Registering MCP Servers
When Asha, an admin at Acme Diagnostics, wanted her agent to look up bookings during a conversation, she didn't write integration code: she opened Integrations, connected the booking system, and its tools were ready to attach to her agent. This page shows how to do the same — from the built-in catalog or with your own server.
New to MCP in Perfox? Read MCP in Perfox first.
The Integrations page
Go to Connect → Integrations. You need permission to view integrations to open the page, and permission to manage them to add, edit, rediscover or delete one.
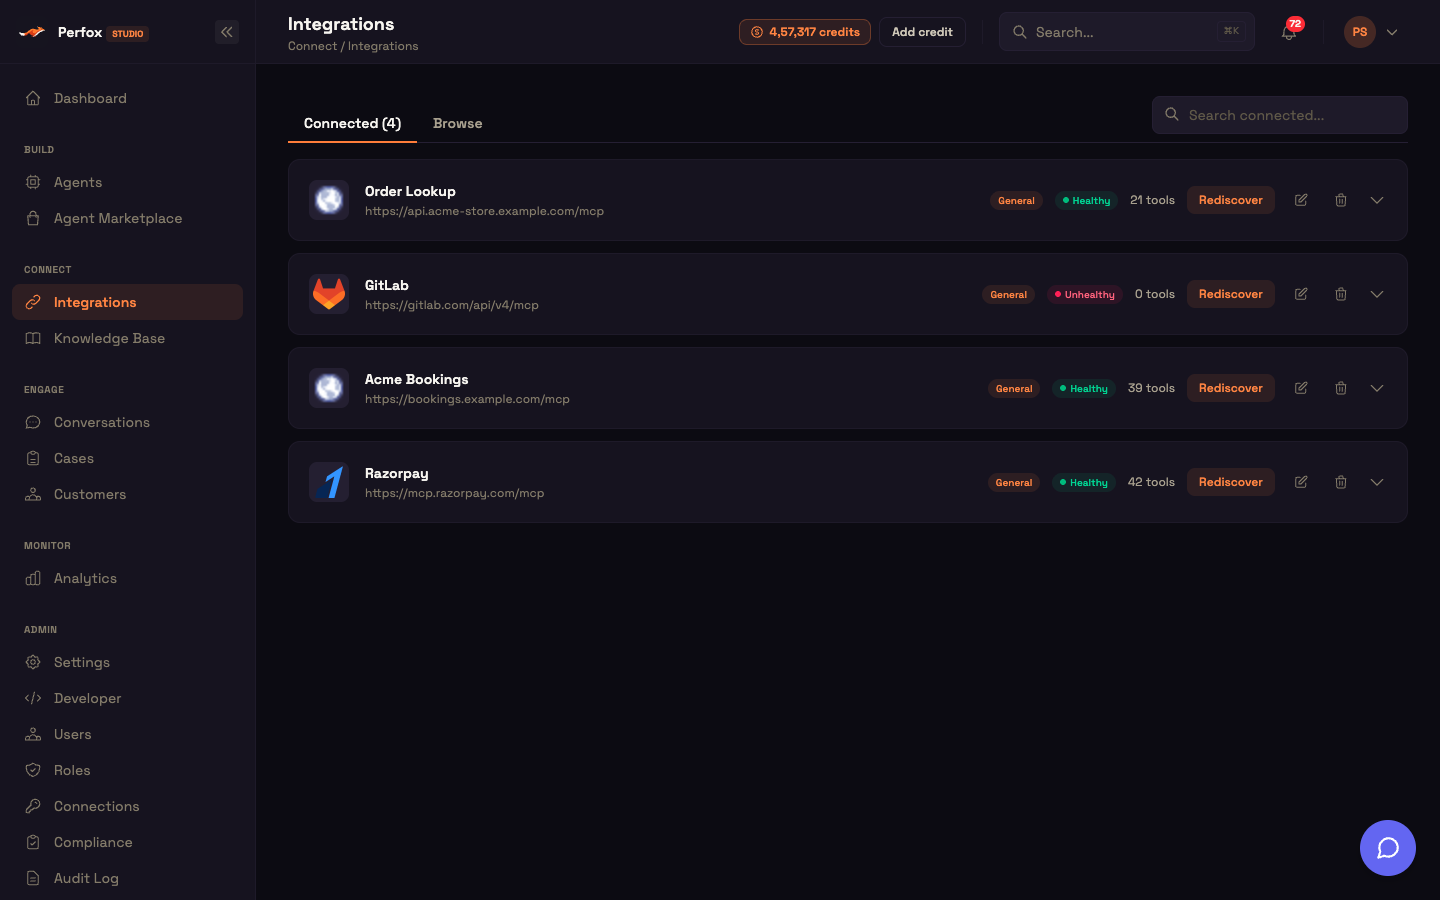
It has two tabs, and the page address remembers which one you're on:
| Tab | What it shows |
|---|---|
| Connected (N) | The servers you've connected. |
| Browse | The catalog of popular integrations, and Add custom server. |
The search box at the top right searches the tab you're on — connected servers by name and address, or catalog entries by name and description. If nothing is connected yet, the page offers shortcuts to browse the catalog or add a custom server.
Connecting a server saves its address and settings, stores any secret you enter encrypted (it's never shown again), and reads the server's list of tools so they're ready to pick on the agent canvas.
Browse the catalog
Browse shows 119 popular MCP servers as cards, most-used first.
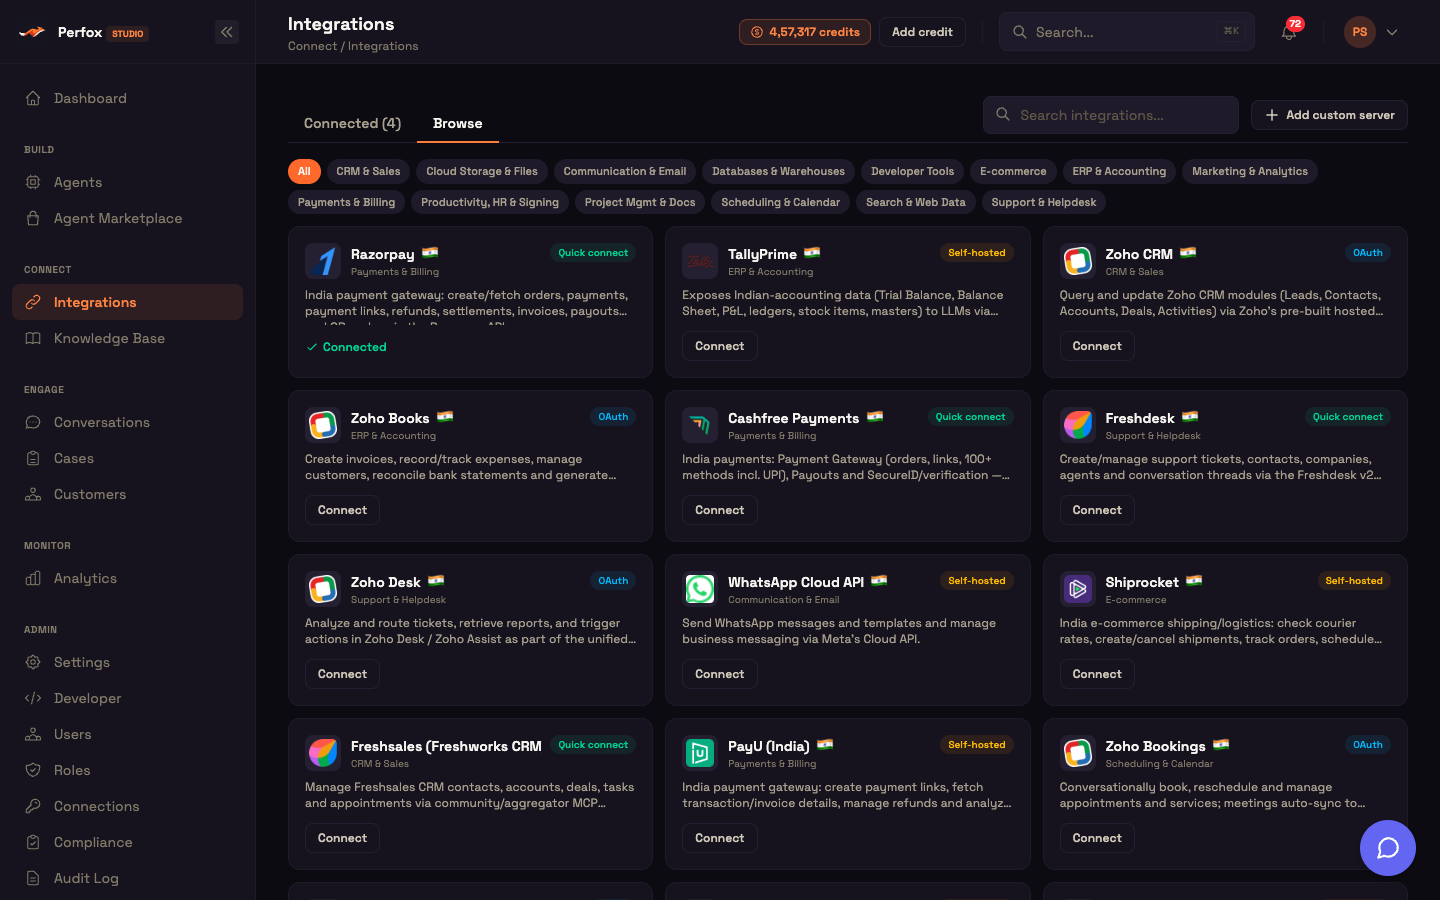
Each card shows the provider's logo, name, category and a short description, a 🇮🇳 flag for providers especially relevant in India, and a badge for how you connect it. Providers you've already connected show Connected instead of a Connect button.
Filter with the category chips — All plus fourteen categories: CRM & Sales · Cloud Storage & Files · Communication & Email · Databases & Warehouses · Developer Tools · E-commerce · ERP & Accounting · Marketing & Analytics · Payments & Billing · Productivity, HR & Signing · Project Mgmt & Docs · Scheduling & Calendar · Search & Web Data · Support & Helpdesk.
Connect badges
| Badge | How you connect |
|---|---|
| Quick connect | Paste the key or token the provider asks for. Perfox connects to the provider's hosted server. |
| OAuth | Sign in with the provider in a pop-up window. No key to paste. |
| Self-hosted | The provider only ships a server you run yourself. Start it, then paste its address. |
| Coming soon | The provider has no MCP server yet. The card can't be connected. |
Connect a catalog provider
Click Connect on a card. The Connect provider window shows the provider and exactly the fields it needs.
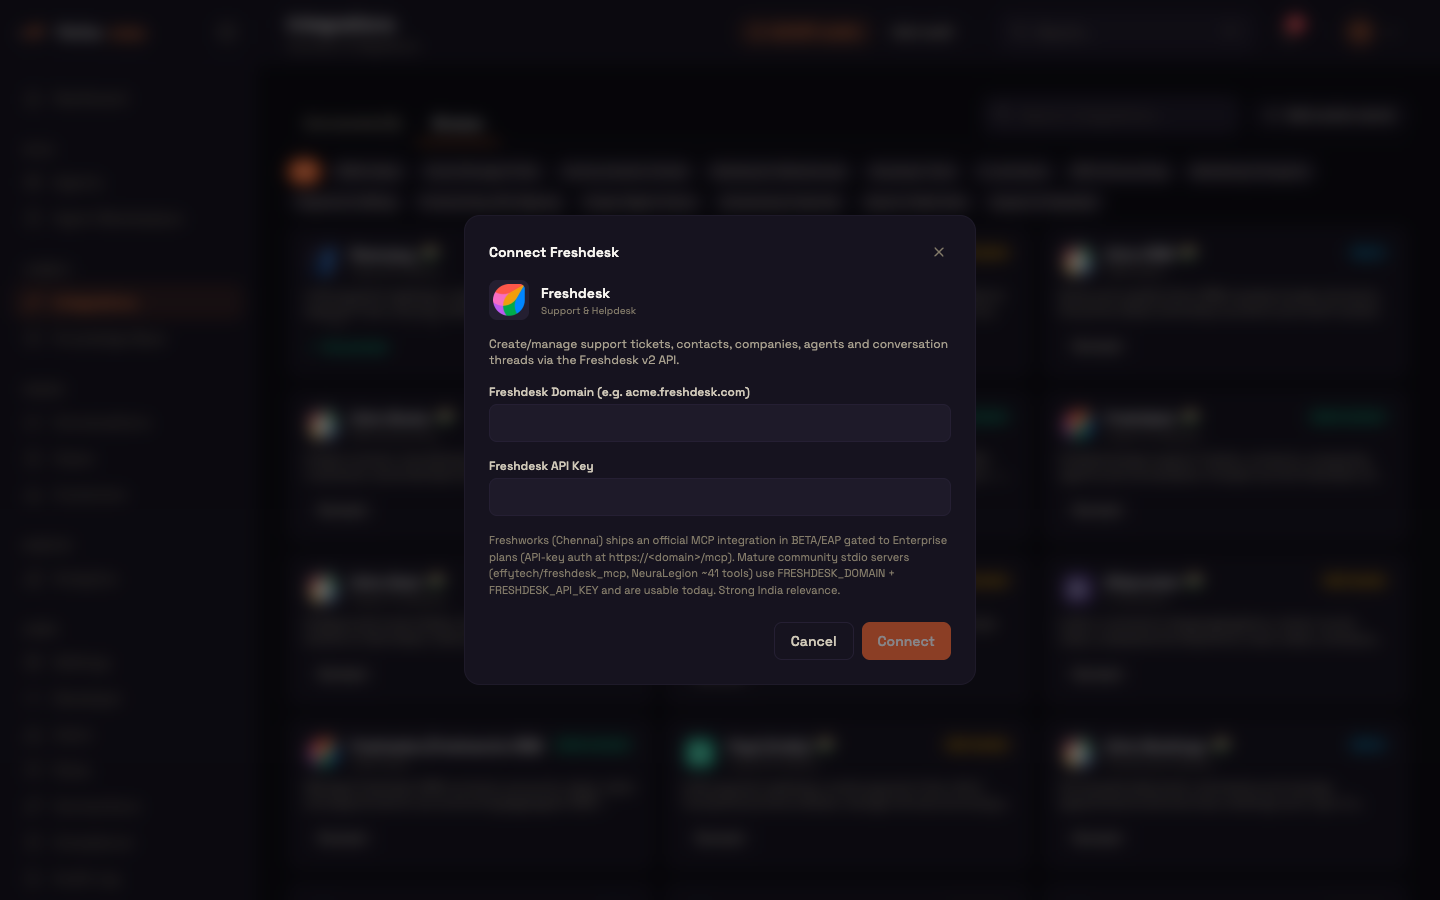
- Fill in the fields. Secret fields are masked and stored encrypted; fields marked (optional) can be left empty. Some fields also complete the server address — for example a store or workspace name.
- For a Self-hosted provider, follow the setup hint (a ready-to-run command with a copy button, or a View setup → link), start the server, and paste its address in Self-hosted server URL.
- Click Connect. It stays disabled until every required field is filled.
Perfox stores the credential, connects to the server and reads its tools. If the tools can't be read yet — for example the server isn't reachable — the connection is still saved, marked Unhealthy, and a message tells you why. Fix the problem and click Rediscover on its card.
Connect with OAuth
For an OAuth provider — or a custom server set to OAuth 2.1 (browser sign-in) — you never type a password:
- Click Connect (or Connect with OAuth). A sign-in window opens and the button shows Waiting for authorization….
- Sign in to the provider and approve access.
- The window closes and the server appears on Connected with its tools.
Perfox registers itself with the provider automatically, so you don't need to create an app with the provider first, and it refreshes the sign-in in the background. If a server passes sign-in on to another identity provider (for example a self-hosted Microsoft 365 server), the window shows the exact redirect address to allow in that provider's app settings — add it before you connect, or sign-in will be refused.
Add a custom server
To connect a server that isn't in the catalog — typically your own — open Browse and click Add custom server.
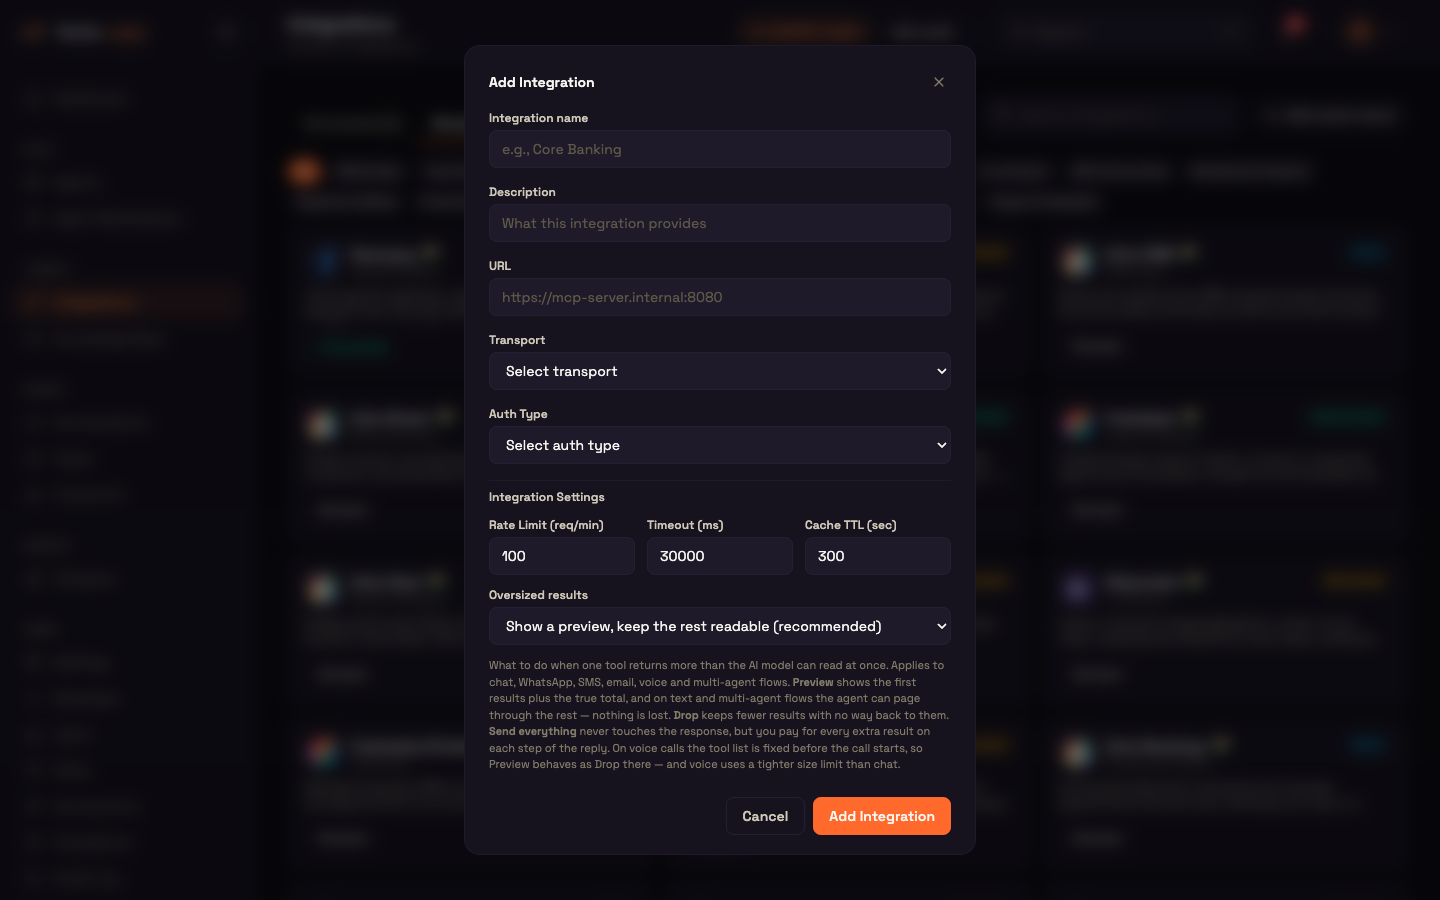
| Field | Notes |
|---|---|
| Integration name | Shown in the agent's integration picker. Must be unique. |
| Description | What the server's tools do. |
| URL | The server's MCP address, usually ending in /mcp. If you paste the base address, Perfox finds the MCP endpoint. Private and internal network addresses are refused. |
| Transport | HTTP (Streamable) or SSE. |
| Auth Type | None, Bearer Token, API Key, Basic (username:password), or OAuth 2.1 (browser sign-in). |
Depending on Auth Type:
- Bearer Token — paste the token.
- API Key — enter the Header Name (for example
X-API-Key) and the key. - Basic — enter
username:password. - OAuth 2.1 — nothing to paste; the button becomes Connect with OAuth and runs the sign-in above. The server must support OAuth sign-in discovery.
Then set the Integration Settings and click Add Integration.
Integration Settings
Every connection — catalog or custom — has these settings, in the add window and in Edit connection:
| Setting | Default | What it does |
|---|---|---|
| Rate Limit (req/min) | 100 | Requests per minute recorded for the connection. |
| Timeout (ms) | 30000 | How long a tool call may take before it's abandoned. |
| Cache TTL (sec) | 300 | How long results may be reused, recorded for the connection. |
| Oversized results | Show a preview, keep the rest readable (recommended) | What to do when one tool returns more than the AI model can read at once. |
Oversized results options:
- Show a preview, keep the rest readable (recommended) — the agent gets the first results plus the true total, and on text and multi-agent flows it can page through the rest; nothing is lost.
- Drop the extra results and say so — the agent gets fewer results, with no way back to the rest.
- Send everything (costly) — the response is passed on untouched, and you pay for every extra result on each step of the reply.
This applies on chat, WhatsApp, SMS, email, voice and multi-agent flows. On voice calls the preview behaves like Drop, and voice uses a tighter size limit than chat.
The Connected tab
Each connected server is a card:
- the provider's logo, name and address;
- a category label;
- Healthy or Unhealthy — whether the last check reached the server;
- the number of tools;
- Rediscover, Edit connection (pencil), Delete (bin), and a chevron to expand.
| Action | What it does |
|---|---|
| Rediscover | Reads the server's tool list again. Agents use the list Perfox saved, so a tool you've just added to your server isn't available until you rediscover. Shows Checking… while it runs. |
| Edit connection | Change the address, transport, auth, secret or settings in place — see below. |
| Delete | Asks for confirmation — agents using its tools will lose access — then removes the server. |
| Expand | Shows the server's tools, on two tabs: Available Tools and Optimized. |
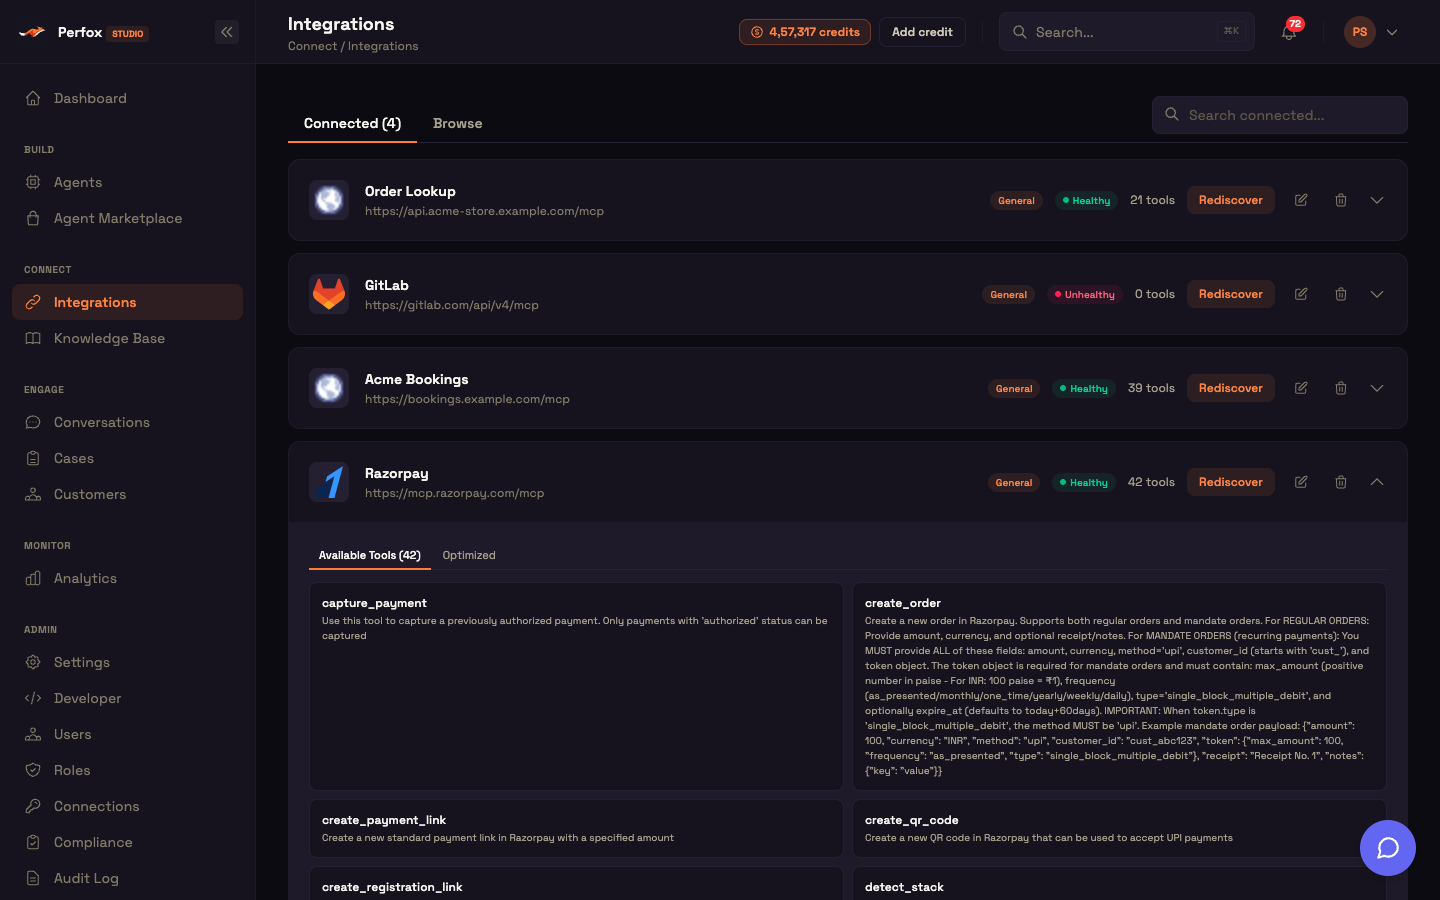
Available Tools (N) lists every tool with its description, exactly as the server declares it. A Too large badge marks a tool that returned more than the AI model could read in the last 7 days, with how often and by how much — a sign to ask the tool's author for fewer results or fields per call.
Optimized tool descriptions
Some servers ship long or overlapping tool descriptions, which cost tokens on every turn and make the agent pick the wrong tool. The Optimized tab can fix that without changing the server:
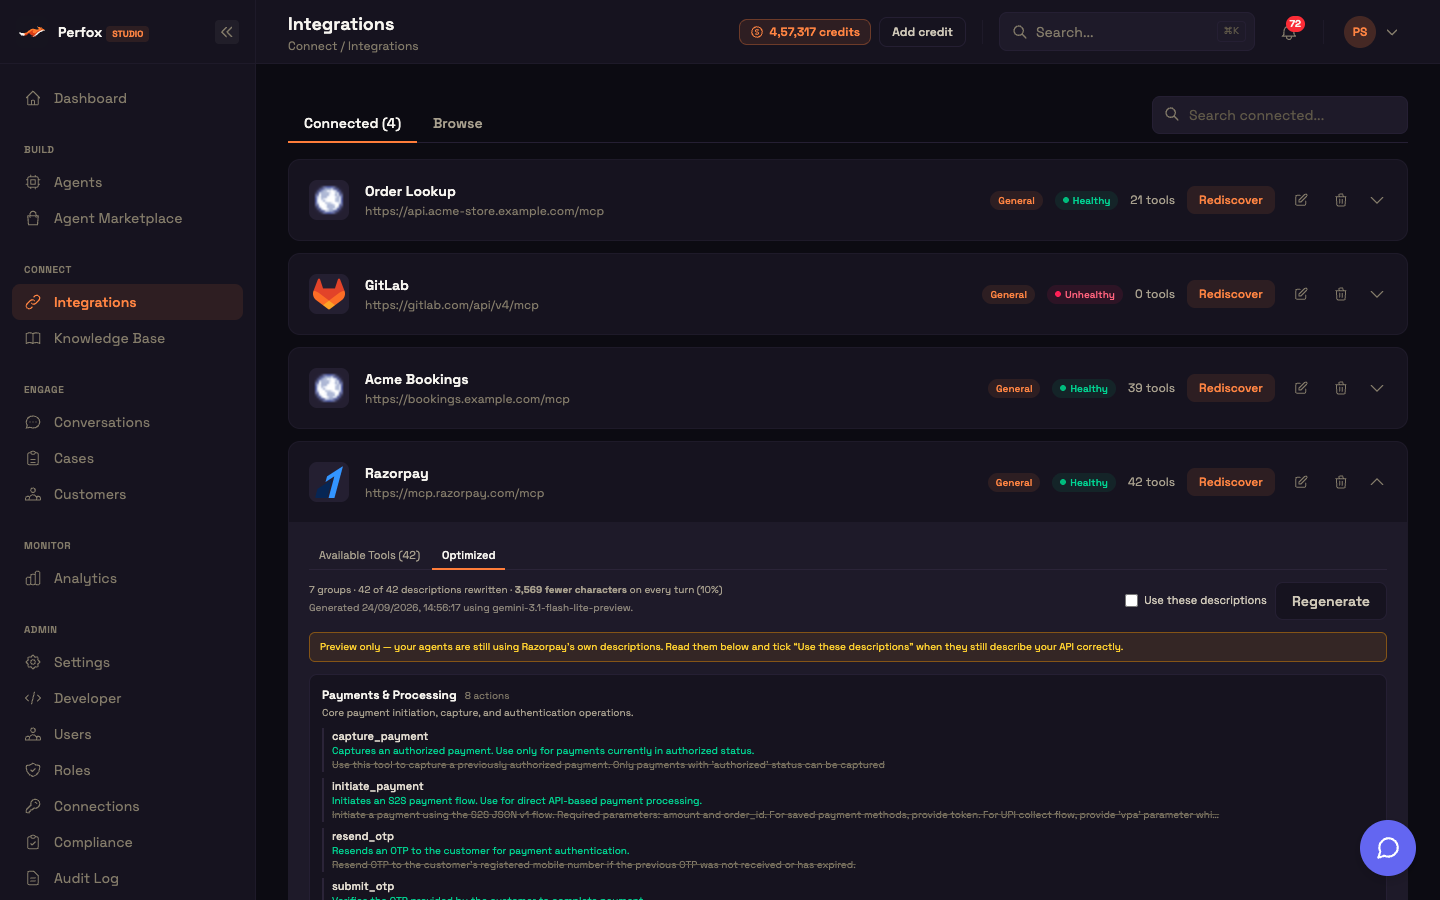
- Click Optimize tools. Perfox groups the tools into domains and rewrites their descriptions more concisely, and shows how many characters that saves on every turn. Nothing is sent to the server, and nothing changes for your agents yet.
- Read the rewritten descriptions — each shows the original crossed out beneath it.
- Tick Use these descriptions to have your agents use them. Untick it to go back to the server's own descriptions; Regenerate produces a fresh version.
Edit connection
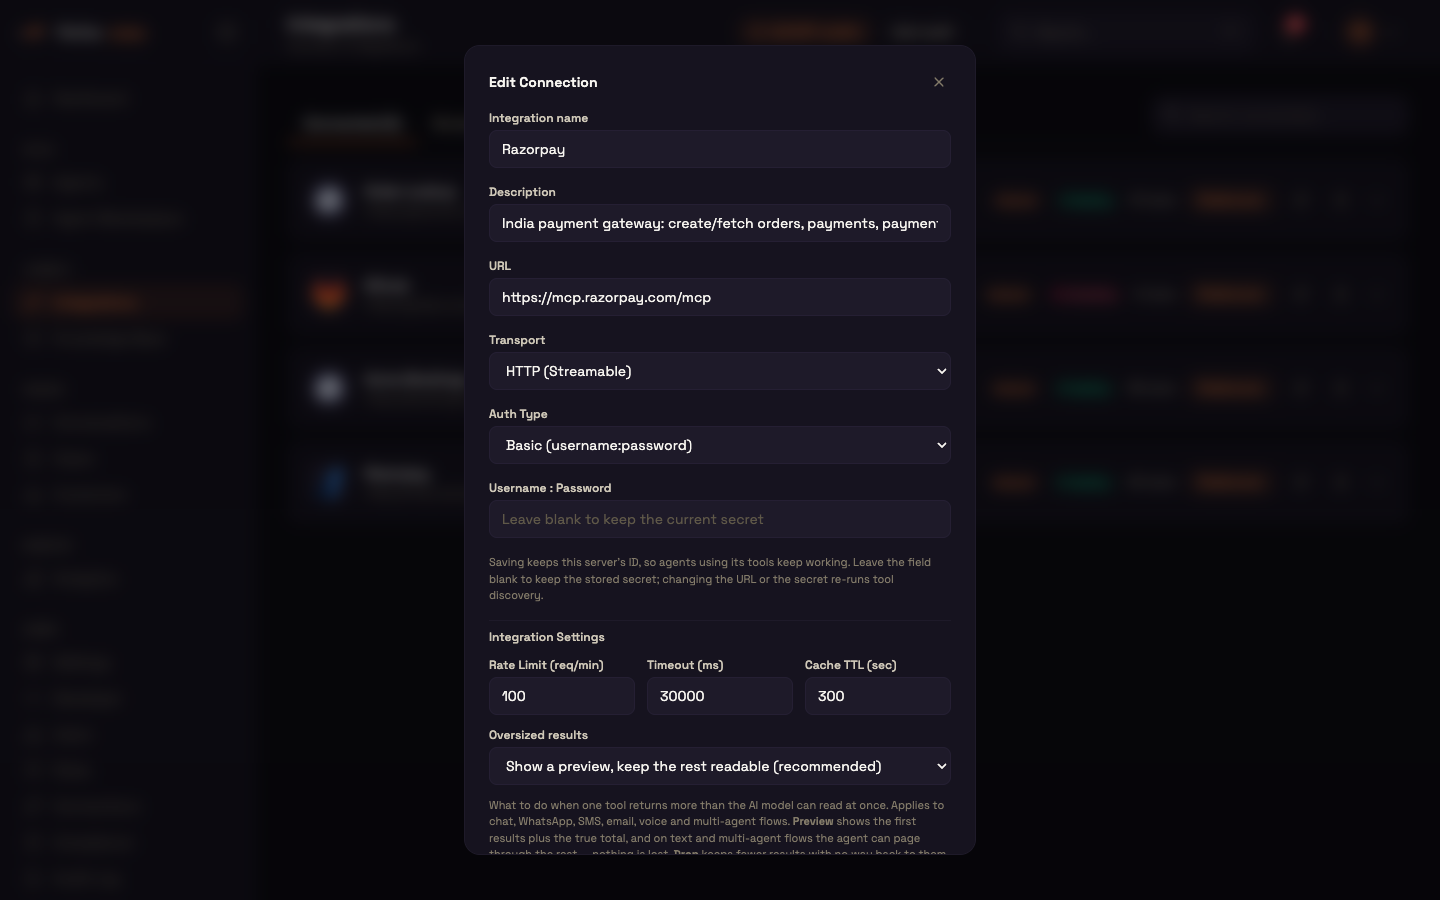
Edit connection changes a server in place and keeps its identity, so agents using its tools keep working — you never have to re-attach it to each agent.
- Leave the secret field blank to keep the current secret. Secrets are never shown back; an empty field means "unchanged", not "remove".
- Tools are re-read only when the connection changes — a new address, secret, auth type or header. Renaming the server or adjusting its timeout doesn't re-check it.
- Auth types are None, Bearer Token, API Key, and Basic (username:password). A server connected with OAuth shows OAuth 2.1 (connected); to sign in again, reconnect it from the catalog.
The same change is available through the management API as PATCH /v1/mcp-servers/{id}.
Worked example — connecting HubSpot
Acme Store's admin Asha wants her sales agent to look up contacts and deals.
Setup. She opens Connect → Integrations → Browse, clicks the CRM & Sales chip and finds HubSpot, marked OAuth.
Action. She clicks Connect, signs in to HubSpot in the pop-up and approves access. The pop-up closes.
Result. HubSpot appears on Connected, Healthy, with its tool count. On her agent's canvas she adds an Integration sub-node, picks HubSpot, and chooses the actions the agent may use.
What just happened. Perfox ran the OAuth sign-in, stored the access encrypted in her workspace, and read HubSpot's tools. When a customer asks about their deal, the agent calls a HubSpot tool with Asha's access attached at that moment — never visible in the conversation.
Next steps
- Building Your Own MCP Server — the contract your own server implements.
- Integration sub-node — attach a server to an agent and choose its tools.
- MCP in Perfox — what happens on every call.
- What's built in — actions that need no server.