Getting Started
A visitor lands on your website, types "Hi", and gets a real answer in your brand's voice, with no form to fill and no wait for a person. By the end of this page you'll have a live AI agent doing exactly that on your own page, and you won't write any code beyond pasting one snippet.
This is for the first-time builder, an admin like Asha at Acme Support who wants a working agent in one sitting. You'll create your workspace, build an agent, test it inside the Studio, publish it, and embed the chat bubble on your page. Each step builds on the last.
1. Create your workspace
Don't have a Perfox account yet? Sign up at perfox.ai with your email or a social login. Your Studio is ready in a couple of minutes, and every new workspace starts with 5,000 free credits, no card needed, which is plenty for building and testing your first agent.
Already signed up? Open your Studio, sign in, and carry on below. (The very first time you sign in, you'll see a welcome screen that offers ready-made starter agents. This page builds one from scratch, so you can see how the pieces fit.)
You don't need to connect anything to follow this page. The AI model is included and managed by Perfox, and web chat needs no outside provider. You'll only visit Admin → Connections later, when you add SMS, WhatsApp, email or phone. See Bring Your Own Provider.
2. Create the agent
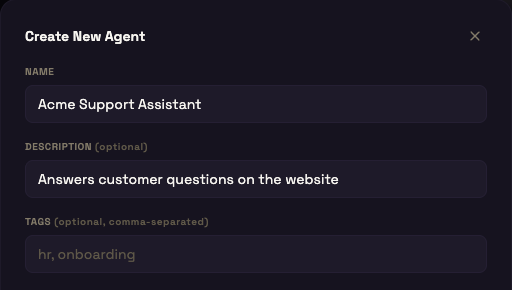
Go to Build → Agents and click + New Agent. Give it a Name, for example Acme Support Assistant, and an optional Description. Leave the other settings as they are and click Create Agent.
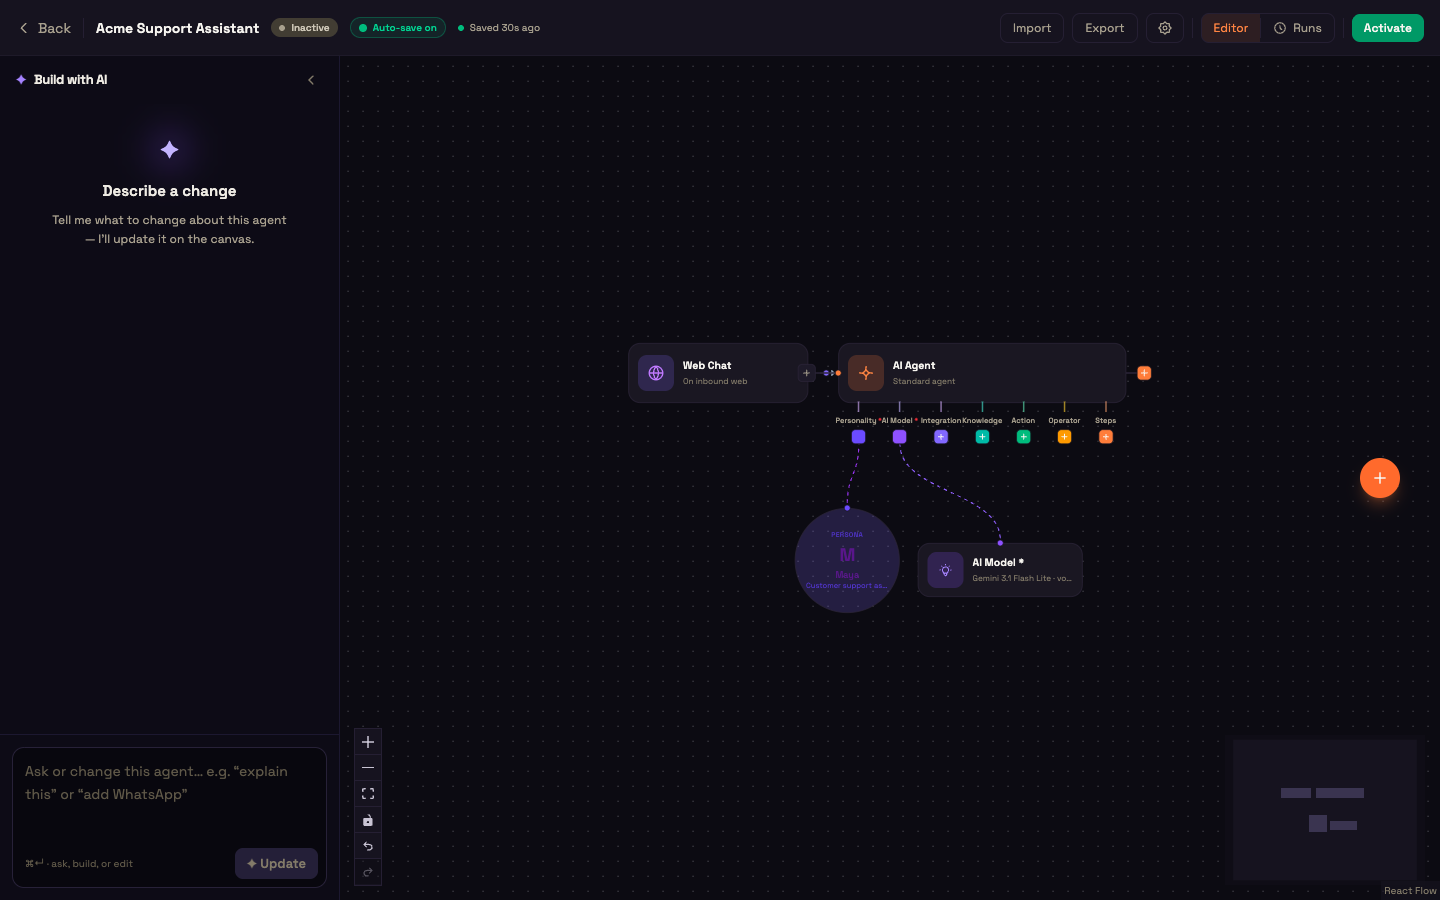
The canvas (the Agent Builder) opens empty. On the left is the Build with AI panel: describe the agent in plain words, or pick a recipe such as Website support or FAQ bot, and it drafts the whole canvas for you. It's a great shortcut. Here you'll build by hand instead, in four clicks. Everything saves as you go, and the top bar shows Saved.
3. Add the Web Chat trigger
Every agent starts with a trigger, the entry point that decides when it runs. Click the orange + on the right of the canvas, open Triggers, and choose Web Chat (On inbound web widget message).
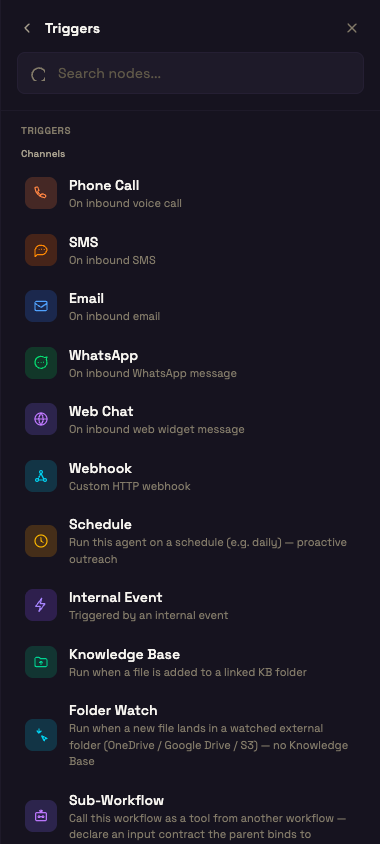
A Web Chat node appears on the canvas. Until the next step it shows a red error badge, because a trigger on its own has nothing to run.
4. Add the AI Agent
Click the small + on the right edge of the Web Chat node. Under What happens next?, choose AI Agent.
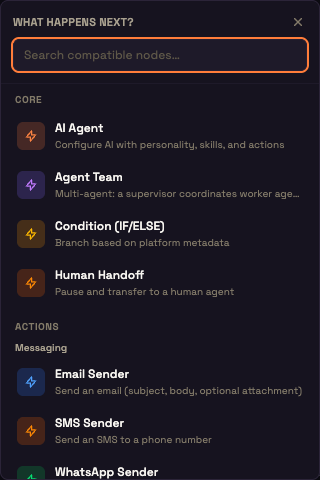
The AI Agent node is connected to the trigger automatically. Along its bottom edge is a row of ports: Personality, AI Model, Integration, Knowledge, Action, Operator and Steps. The two marked with a red asterisk are required.
5. Give it a personality
Click the + under Personality, then choose Personality. A Personality node appears below the agent. Click it to open its panel and fill in:
- Name: what the agent calls itself, for example Maya.
- Role: a short job description, for example Customer support assistant.
- Tone: for example Friendly.
- System prompt: how the agent behaves. For example:
You are the website assistant for Acme Support. Answer questions briefly and politely, confirm before booking anything, and never invent prices, dates or results. If you do not know, say so and offer to connect the customer with the team.
- Greeting: the first message a visitor sees, for example Hi! I'm {persona_name} from Acme Support. How can I help you today? (
{persona_name}fills in the name automatically.)
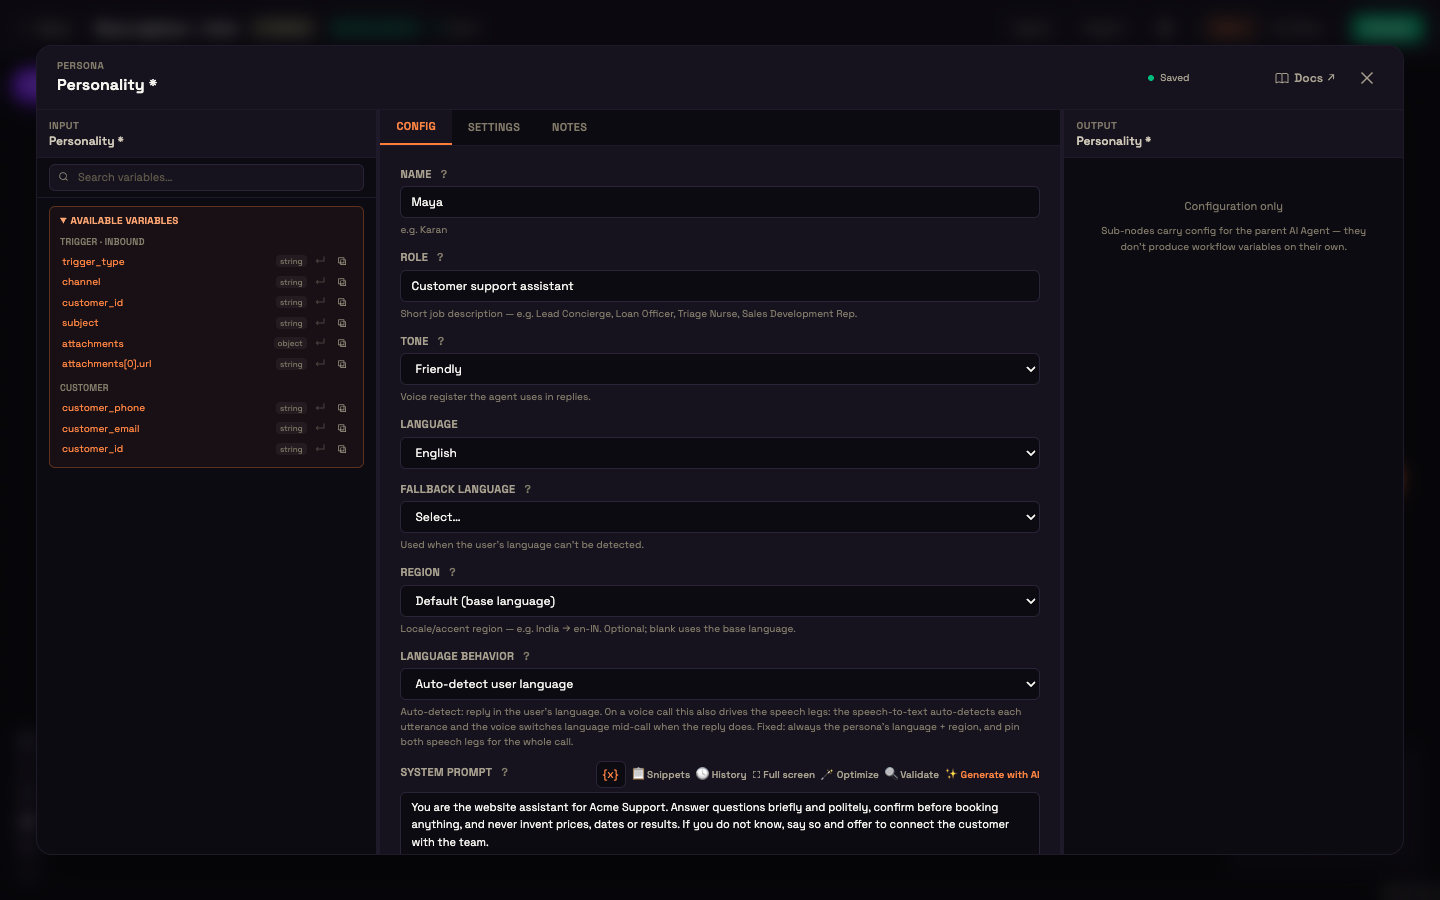
Close the panel with the × in the top-right. Changes save automatically.
6. Add the AI Model
Click the + under AI Model, then choose AI Model. The model is included and managed by Perfox, so there's no key to add. Leave Model on Platform default for now, or click the node to pick a specific model, set Creativity and Max reply length, and choose a voice for calls.
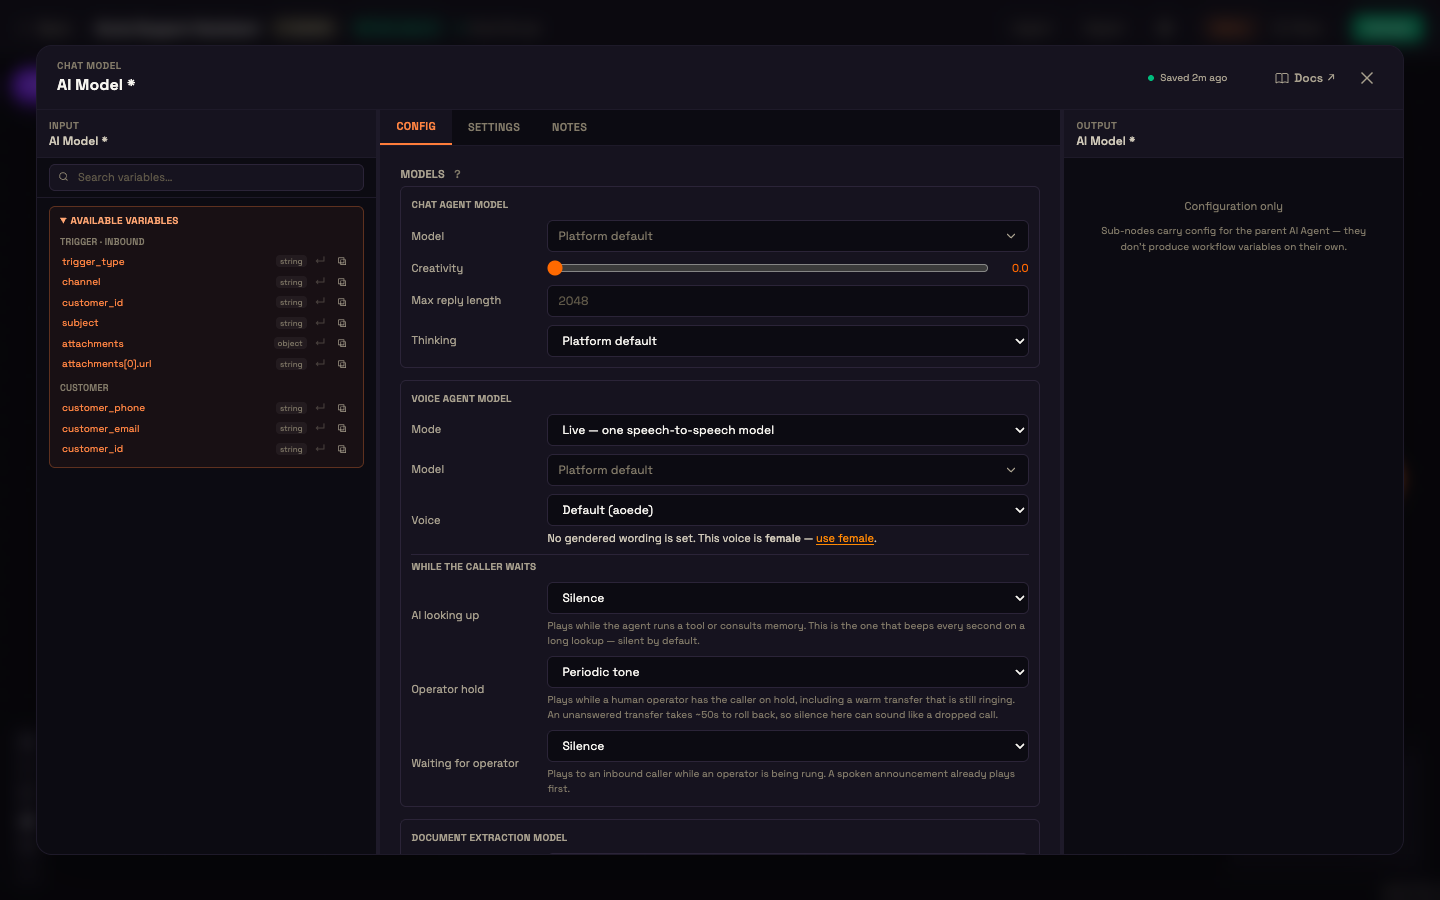
Your agent is now complete: a Web Chat trigger, an AI Agent, a Personality and an AI Model. The error banner is gone, and Activate in the top-right is available.
7. Test it in the live preview
Talk to the agent before anything goes live. Click the Web Chat node, stay on Configure, and click Live preview. The real chat widget opens beside the settings and runs your current draft. You don't need to publish first.
Type "Do you open on Sundays?" and press Enter.
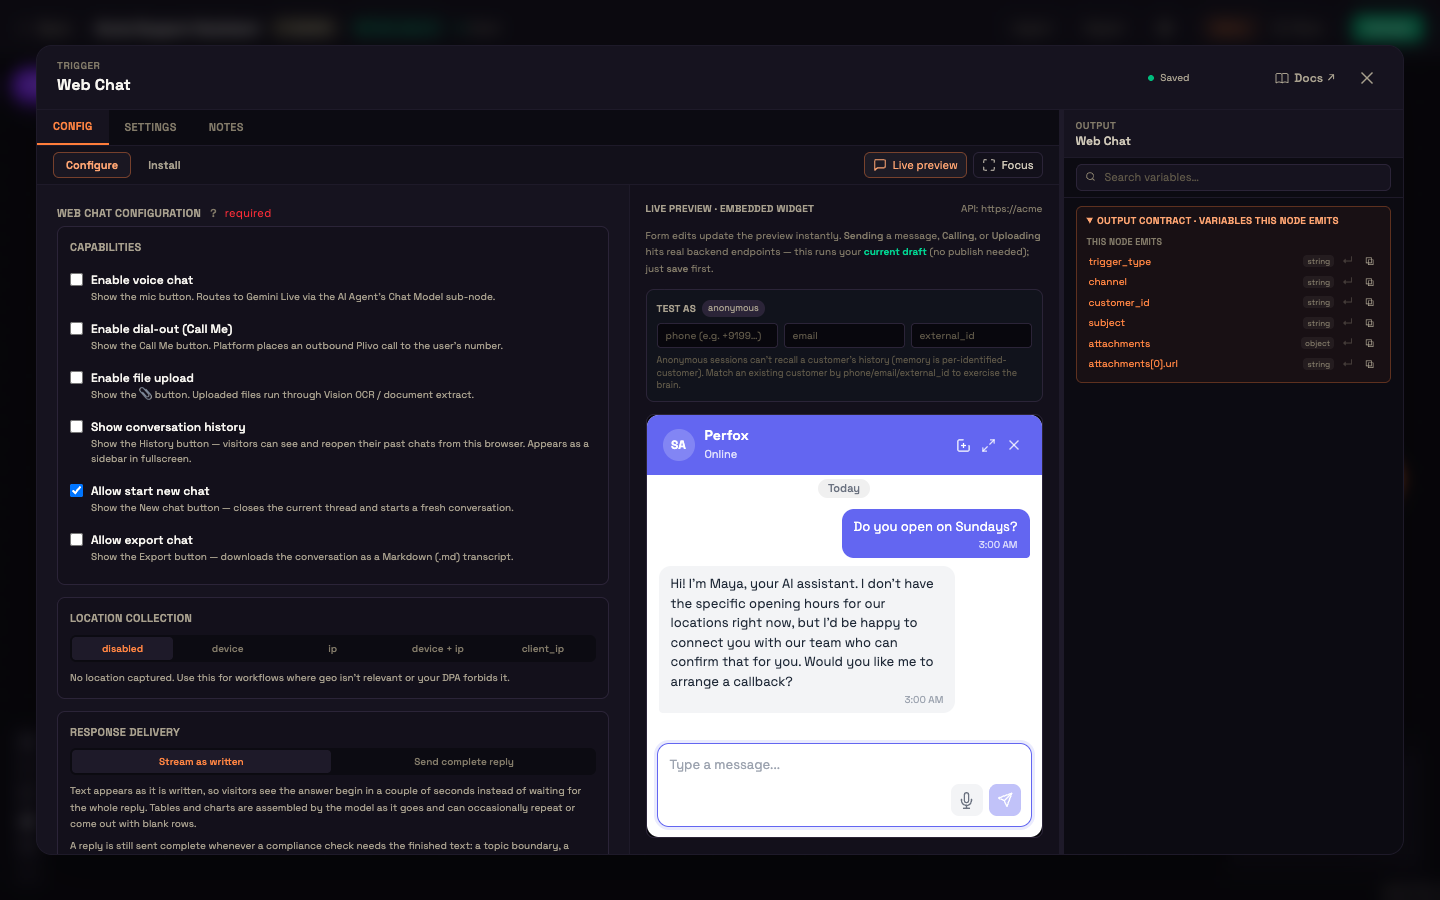
The preview updates as you change the settings on the left, such as the voice button, file upload, history, or Conversation starters. To test as a known customer rather than an anonymous visitor, fill in Test as with a phone number, email or external ID.
8. Activate
Click Activate in the top bar. Activating publishes the agent: the next visitor on your website chat is answered by it. There's no separate build or release step. Change the agent later and activate again to publish the new version. Embedded chats always run the last activated version, so visitors never see your work in progress.
9. Embed the widget on your page
Open the Web Chat node again and switch to the Install tab.
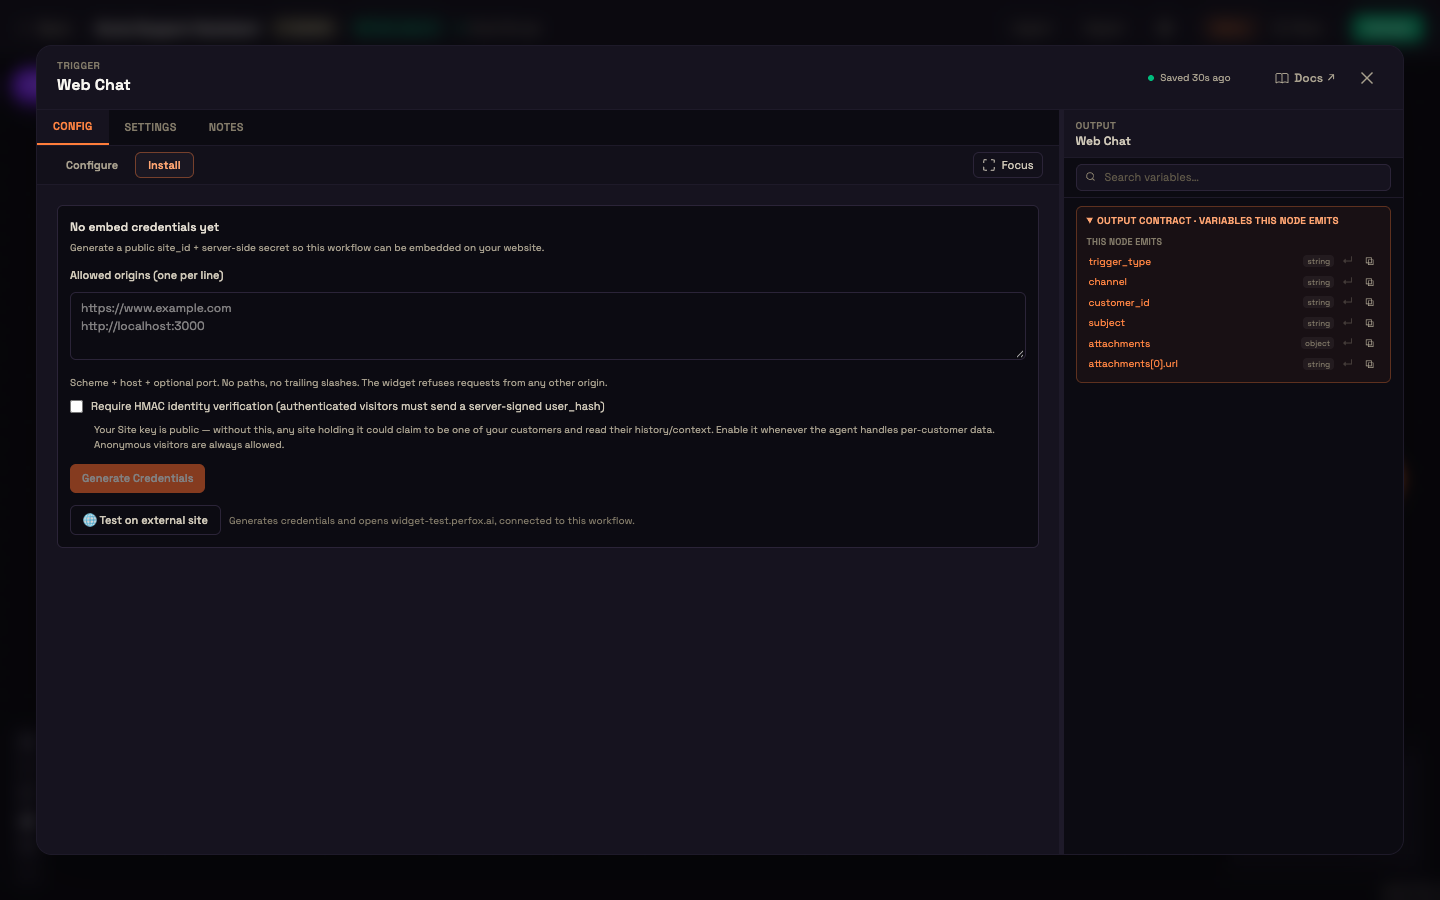
- Under Allowed origins, enter the address your site is served from, one per line, for example
https://www.example.com. The widget refuses requests from any other origin. - Click Generate Credentials. Perfox shows your Site key (it starts with
sa_site_live_), a site secret (shown once; you only need it for identity verification) and a ready-to-paste snippet. - Paste the snippet into your page's
<head>, or just before</body>. It looks like this:
html
<script>
  (function(){var w=window;w.Perfox=w.Perfox||function(){(w.Perfox.q=w.Perfox.q||[]).push(arguments);};})();
</script>
<script
  src="https://your-workspace-api.perfox.ai/widget/v1/widget.js"
  data-site="sa_site_live_YOUR_SITE_KEY"
  defer></script>
Reload your page and a chat bubble appears. The first script is a small queue that holds any calls your page makes before the widget has loaded. The second loads the widget from your workspace and identifies your site with data-site.
Want to try it on a real page before touching your own site? Test on external site on the same tab opens a test page already connected to this agent.
10. Identify your visitor (optional, recommended)
If your visitor is signed in on your site, tell the widget who they are so the agent can greet them by name and remember them next time:
js
// After your sign-in flow completes
window.Perfox('identify', {
  name:        'Priya Sharma',
  email:       'priya@example.com',
  external_id: 'cust_abc123',   // your stable customer id
});
Perfox recognises a customer across channels by phone, email and WhatsApp, so the same person who chats on your site today and messages your WhatsApp number next week is one customer.
For production, sign the identity on your server so it can't be faked. See Identity Verification. All widget commands and events are in the Widget SDK.
What just happened
Setup. Asha built the Acme Support agent, tested it in the live preview, activated it and pasted the snippet on the homepage.
Action. Priya, a first-time visitor, opens the site, clicks the chat bubble and types "Hi, do you open on Sundays?"
Result. The widget sends her message to Asha's workspace. The Web Chat trigger matches, the agent runs, and Priya reads a short, on-brand reply a moment later.
From FAQ bot to a real agent
What you built answers questions. A production agent usually needs to act on this customer's data, such as their orders, bookings or account. That means connecting your own tools and letting the conversation become authenticated before private data is shared. Your server tells Perfox a conversation is authenticated, and Perfox then forwards that verified identity to your tools on every later call.
➡️ Worked example: an authenticated customer-data agent
Where to go next
- Build your first agent — the same build as a short hands-on lesson.
- Add a knowledge base — answer from your own documents.
- Take your agent live on WhatsApp — reach customers on a channel they already use.
- Embed Quickstart — the embed script and SDK in depth.
- Authentication & Auth Broker — how your server decides a customer is signed in.