Connect an MCP Server (HR Assistant)
Priya, who works at Acme, opens a chat and asks, "How many leave days do I have left, and can I carry them over?" She gets a straight answer with her real numbers — and none of Acme's HR data ever left the server Acme already runs. That's the whole idea of this page.
By the end you'll have registered an MCP server you own with Perfox and built an agent that calls its tools. Your business logic and data stay in your server; Perfox brokers the conversation. This page is for someone who already has (or can build) a small server and an admin like Asha who can open the Studio.
The worked example is an HR assistant named Penny. She answers colleagues' questions about leave, pay, and policies by calling an HR MCP server you host, and she answers policy text from a Knowledge Base.
What you'll build
An agent that calls your HR MCP server for a colleague's data and requests, and answers policy questions from a Knowledge Base folder attached to the agent. The agent stays generic — every HR rule and figure lives in your MCP server, and Perfox discovers whatever tools your server advertises. You write the rules once, in the place you already control.
Prerequisites
- An MCP server reachable over HTTPS that answers the streamable-HTTP MCP endpoint (commonly the
/mcppath). If you haven't built one yet, follow Building Your Own MCP Server. - Access to Connect → Integrations and Build → Agents in your Studio.
How Perfox calls your server
Every tool call the agent makes flows through a managed request pipeline: discover the server's tools, validate the inputs, apply tool policy, enforce rate limits, serve from cache when possible, inject the right credential, invoke your server, and record an audit entry. The rate limiter is a per-tool sliding window — when your server's configured rate limit is exceeded, the call is rejected instead of overwhelming your server. You set that rate limit (along with the timeout and cache duration) on the integration to match what your server can handle. Think of it as a polite doorman: it keeps the traffic steady so a busy afternoon of questions never floods the server you host.
Steps
1. Have your MCP server reachable
Deploy your MCP server so it answers over HTTPS at its MCP endpoint. When you register it, Perfox canonicalizes the endpoint for you — if you paste a bare base-origin URL that doesn't respond, it automatically tries the /mcp path — so you can register either form.
2. Register it as an Integration
Go to Connect → Integrations. The Connected tab lists the servers you've already connected. Click Add Integration to register your own.
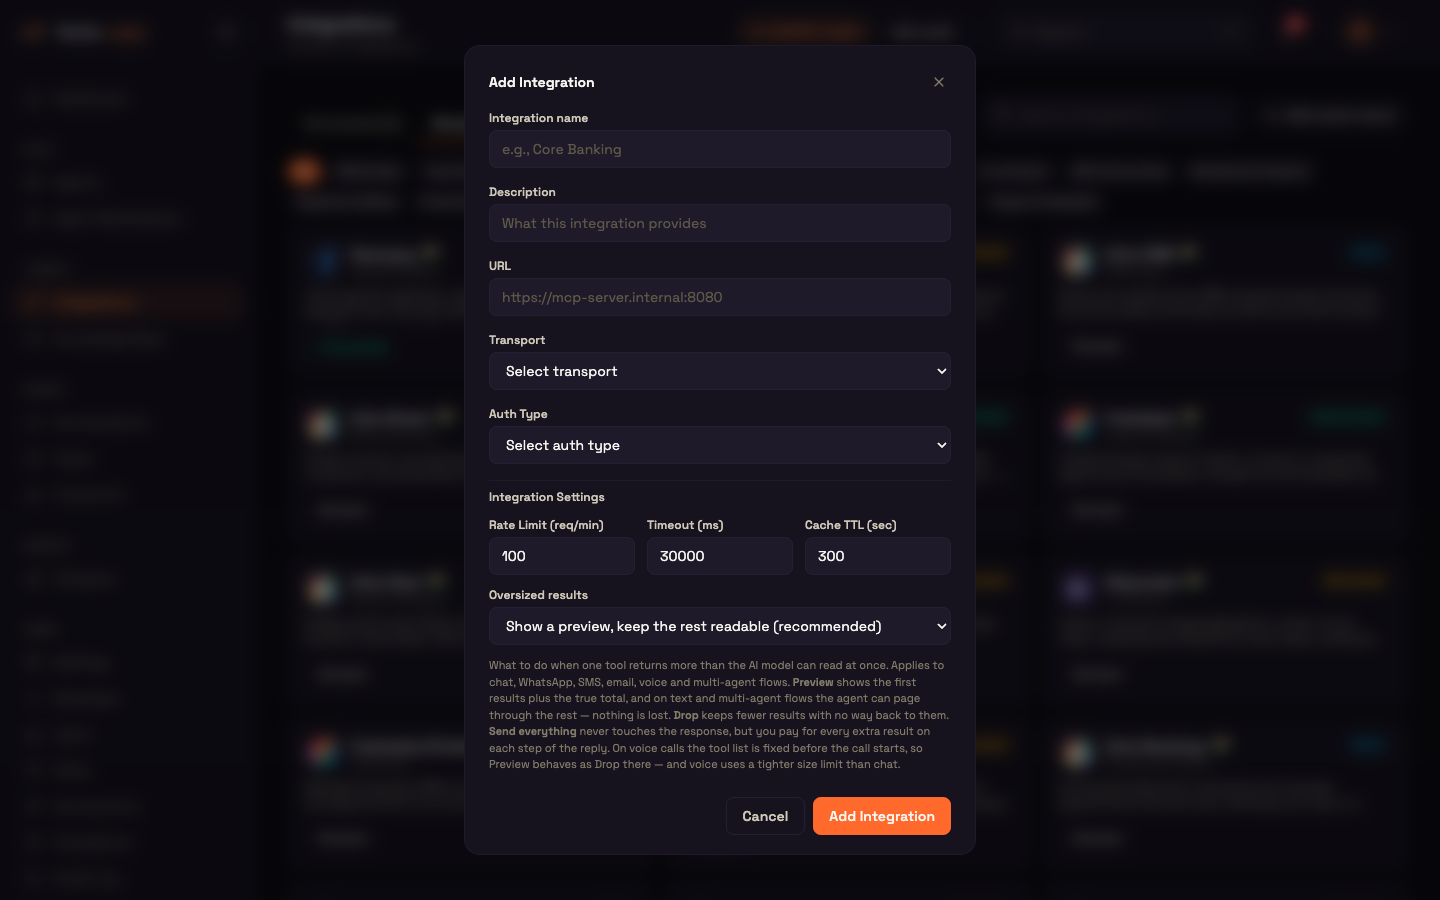
Fill in the form:
| Field | What to enter |
|---|---|
| Integration name | A display name, e.g. HR System. You'll pick it by this name on the agent. |
| Description | One or two sentences on what the server's tools do. |
| URL | Your MCP endpoint, e.g. https://hr.example.com/mcp. |
| Transport | How Perfox talks to your server. |
| Auth Type | None, or the kind of token your server expects, plus the credential that supplies it. |
| Integration Settings | Rate Limit (requests per minute), Timeout and Cache TTL, set to what your server can handle. |
| Oversized results | What to do when one tool returns more than the AI can read at once. The recommended option shows a preview and keeps the rest readable. |
Prefer a hosted provider over running your own server? The Browse tab has a catalog of ready-made integrations, many of which connect in one click with the provider's own sign-in. Either way, secrets are stored encrypted, and if Perfox can't list your server's tools it tells you so instead of failing quietly. See Registering an MCP Server.
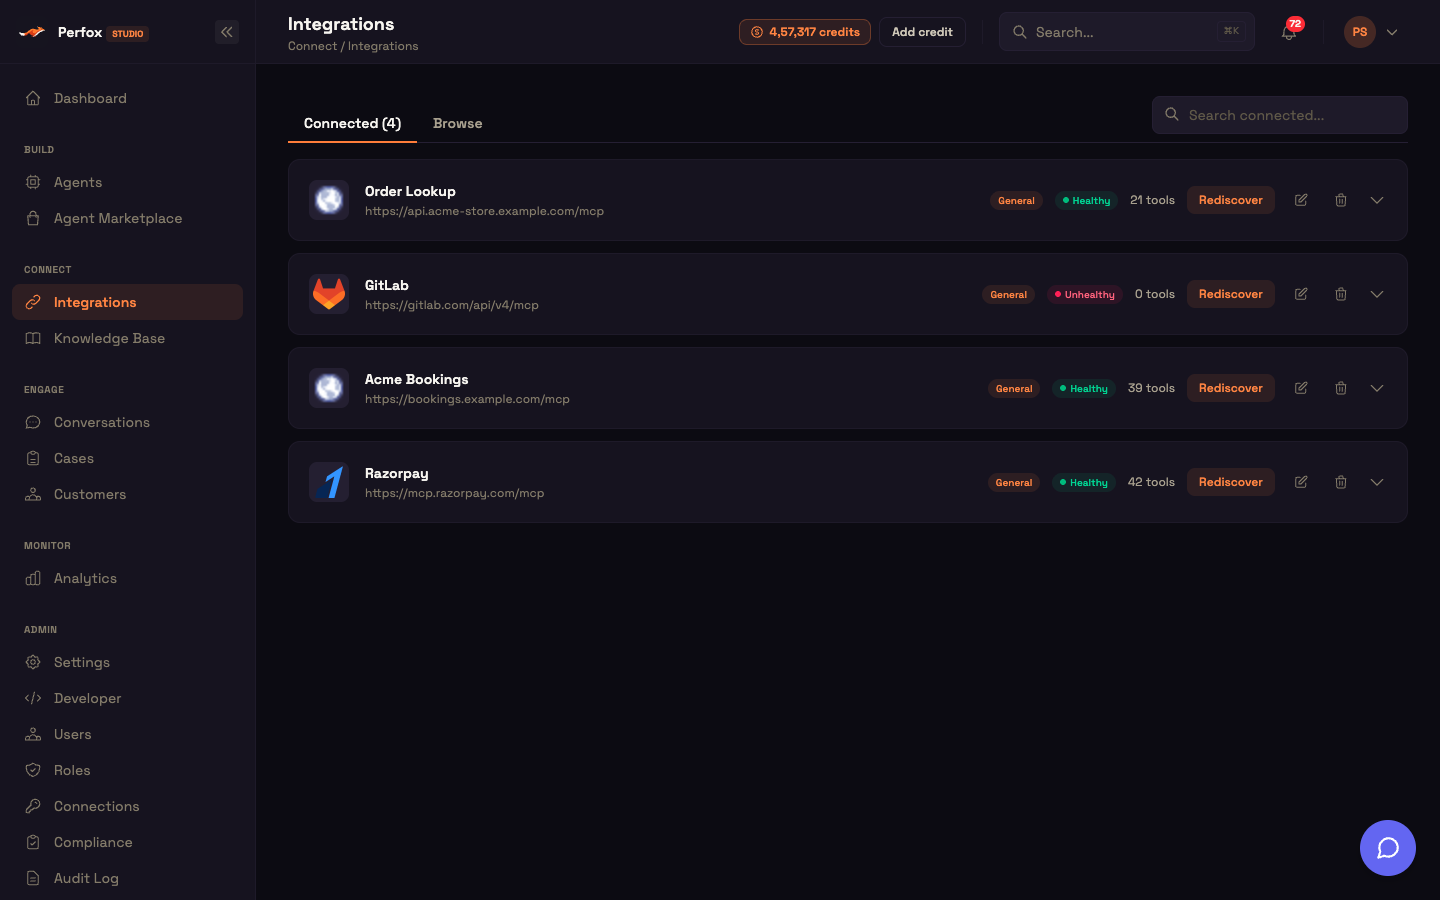
When you register a server, Perfox reads the list of tools it offers. Expand the server's card to see them: exactly what your server advertised, nothing more.
3. Build the agent
Open Build → Agents, create a new agent, and add a Web Chat trigger and an AI Agent (Getting Started shows the clicks). Then add its two required sub-nodes:
- Personality: make Penny's job and guardrails explicit:
You are Penny, Acme's HR assistant. Help colleagues with leave, pay, expenses and policies. Resolve the colleague first, and NEVER invent figures. Read them from the tools.
- AI Model: leave it on Platform default. The model is included and managed by Perfox.
4. Attach the tools
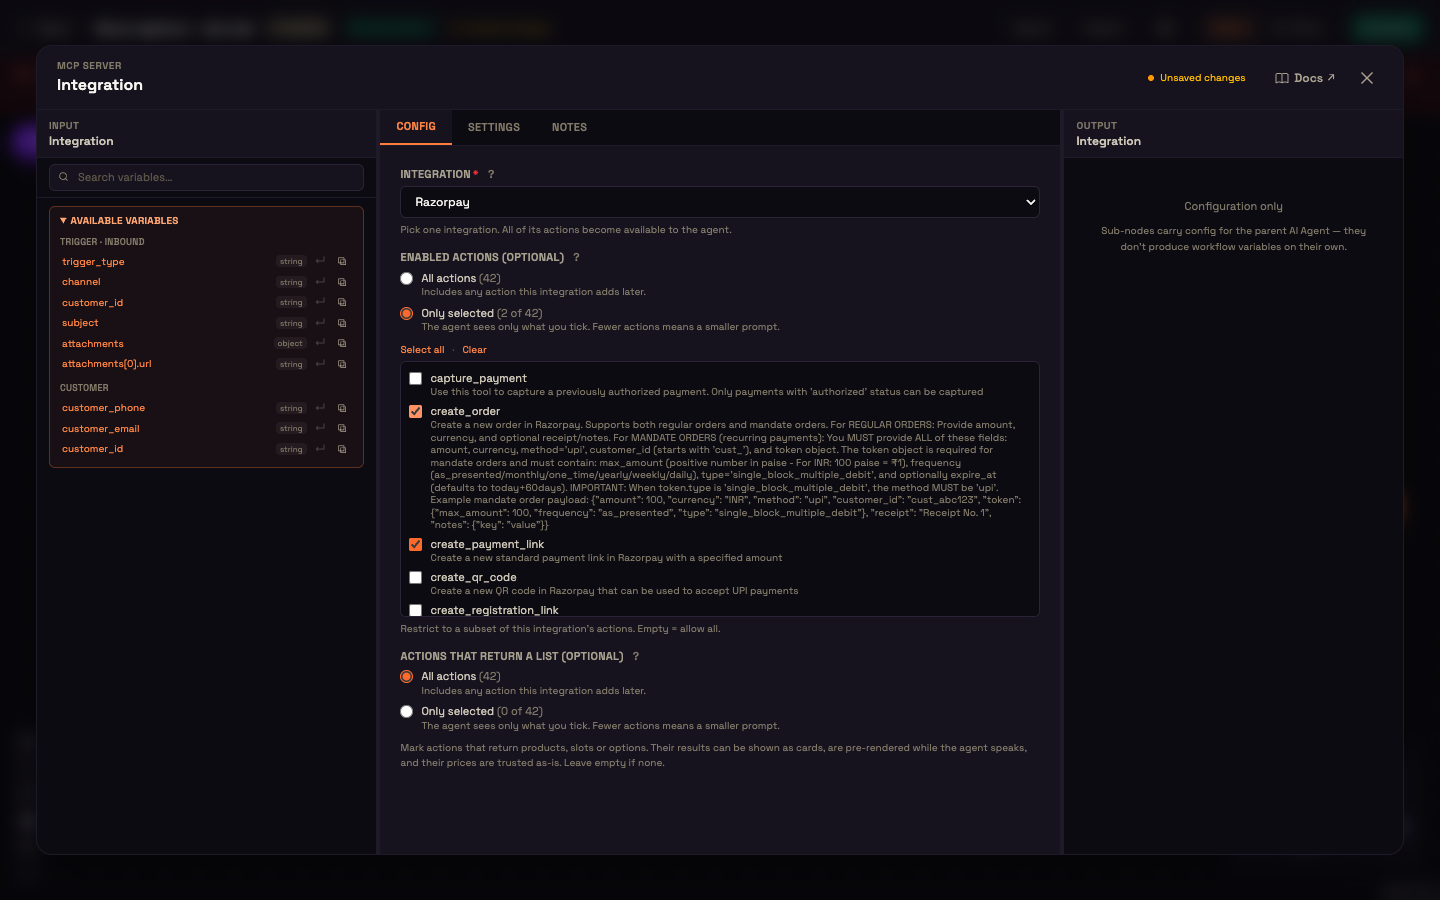
Click the + under the AI Agent's Integration port, add an Integration sub-node, open it, and pick HR System under Integration. Under Enabled actions choose All actions, or Only selected to tick just the tools this agent may use. That's useful when one server offers both colleague-facing and HR-admin tools, and fewer tools also means a smaller, faster prompt.
5. Add policy content as Knowledge
Let the HR MCP return policy metadata, and answer the policy text from a Knowledge Base. Click the + under the AI Agent's Knowledge port, add a Knowledge sub-node, and tick the folder holding your policy documents. Retrieval is folder-scoped to the folders wired on the sub-node, so the agent searches your policy folder, not your whole Knowledge Base.
6. Activate
Click Activate. To let colleagues reach Penny on WhatsApp too, add a WhatsApp trigger and a WhatsApp Sender on the Action port. See Take your agent live on WhatsApp.
A full run, start to finish
Here's what the pieces above look like once they're working together.
Setup. Asha has registered Acme's HR server as the HR System integration, attached it to Penny, wired the policy folder as Knowledge, and activated Penny on Web Chat.
Action. Priya opens the chat and types:
Priya: Hi Penny, how many leave days do I have left this year, and can I carry the unused ones into next year?
Result. Penny resolves Priya first, calls the matching tool on Acme's HR server for her balance, and reads the carry-over rule from the policy folder:
Penny: Hi Priya. You have 7 leave days left for 2026. Per Acme's leave policy, you can carry over up to 5 unused days into next year; anything beyond that lapses on 31 December. Want me to note a reminder to book them before then?
What just happened. Penny didn't guess the "7 days" — she read it live from your server through the managed request pipeline, which injected the credential and recorded an audit entry along the way. The carry-over sentence came from your policy folder, folder-scoped so Penny only searched HR content. Priya's real HR data never left the server you host; Perfox only carried the conversation.
Test it
Open the Web Chat node's Live preview and ask a colleague's question — Penny calls the matching tool and reads the figure from your server rather than inventing it.
If a tool you just shipped isn't being called, click Rediscover on the Integration. Agents read a cached tool list, so a newly added tool is invisible until you re-sync. Rediscover re-reads your server's live tool list, and the new tool appears on the Integration sub-node.
Variations
- Restrict the tool set — use Only selected to give a public-facing agent only the read-only tools, and keep write/HR-admin tools for an internal agent.
- Attach multiple MCP servers — add more Integration sub-nodes; an agent can call across several servers in one turn.
- Gate sensitive data behind login — have your server refuse a colleague's data until the conversation is authenticated. The authenticated-identity path for your MCP tools is the auth-context broker: your server posts an authenticated request (signed by the per-conversation token or your workspace API key) to set the authenticated context for that conversation, and Perfox then securely forwards that identity to your server on subsequent tool calls. See Authentication.
You can now
You can now register an MCP server you own, attach its tools to an agent, ground policy answers in a folder, and activate the agent on a channel — with your HR data staying in your server the whole time.
Where to go next:
- Building Your Own MCP Server — if you don't have a server yet, start here and come back.
- Registering an MCP Server — the reference walk-through for the registration modal you filled in above.
- Agents and MCP — how the agent decides which tool to call and when.
- Authentication & Auth Broker — set up the login gate from the last variation so your server only returns a colleague's data once the conversation is authenticated.