Build your first agent
By the end of this tutorial you'll have a working AI agent, with its own personality, answering real messages inside your Studio. You'll build it from an empty canvas, so you can see exactly how the pieces fit together. No code.
This is a hands-on lesson: do each step in your own Studio as you read. We'll build a simple web-chat assistant for a fictional business, Acme Store. If you'd rather not start from scratch, the Agent Marketplace and the canvas's Build with AI recipes give you ready-made agents to customise instead. But building one yourself, once, is the fastest way to understand how Perfox works.
What you'll build
A single agent that greets a visitor on web chat and answers in the tone you set. You'll assemble it from four pieces on the canvas: a trigger, an AI Agent, its personality and its AI model. Then you'll chat with it and take it live.
Before you start
You only need a Perfox workspace you can sign in to. New workspaces come with 5,000 free credits, which is more than enough for this lesson.
Tip. There's nothing to install and no AI key to set up. The AI models are included in Perfox. Plan on about ten minutes.
1. Create the agent
Go to Build → Agents and click + New Agent. Give it a Name, such as Acme Store Support, and click Create Agent.
The canvas (the Agent Builder) opens, empty, with the Build with AI panel on the left and an orange + on the right. Everything auto-saves as you go, and the top bar shows Saved.
2. Add the way in: a trigger
Every agent starts with a trigger, the entry point that decides when it runs. Click the orange +. A panel asks "What triggers this workflow?" Open Triggers, then choose Web Chat (On inbound web widget message).
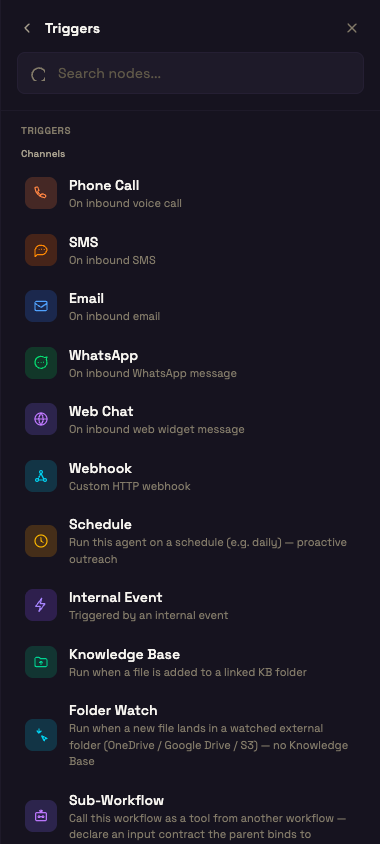
You should now see a Web Chat node on the canvas. That's the door your visitors come through. A red badge and an error banner stay until the agent is complete. That's expected.
3. Add the AI Agent
Click the small + on the right edge of the Web Chat node. Under What happens next?, choose AI Agent.
You should now see an AI Agent node connected to Web Chat, with a row of ports along its bottom edge: Personality, AI Model, Integration, Knowledge, Action, Operator and Steps. Personality and AI Model are marked required.
4. Give it a personality
Click the + under Personality and choose Personality. Click the new Personality node to open it, then fill in a Name (say, Sam), a Role (Customer support assistant), a Tone (Friendly), and the System prompt:
You are the support assistant for Acme Store. Be warm and brief. Help customers with orders, returns and shipping. If you don't know something, say so plainly and offer to connect a human. Never invent an answer.
Optionally, set a Greeting, the first message visitors see. Then close the panel.
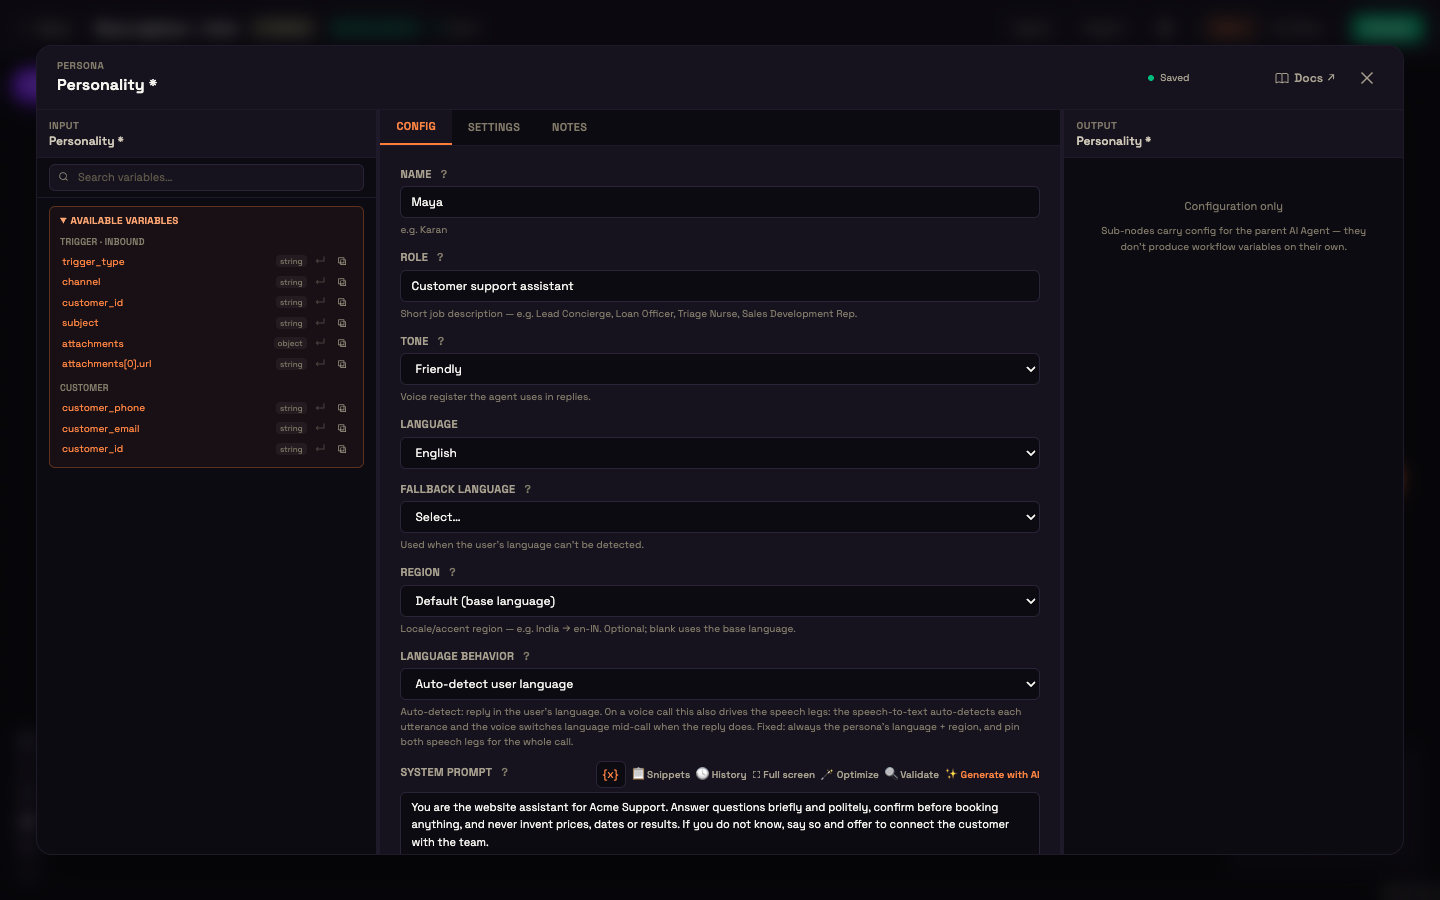
Why this matters. The Personality is where the agent's instructions live. A short, specific prompt beats a long, vague one, and you can refine it any time.
5. Add the AI Model
Click the + under AI Model and choose AI Model. That's all you need: the model is included and managed by Perfox, and Platform default is a good start. (Click the node later if you want to pick a specific model or a voice for calls.)
You should now see the error banner disappear and the Activate button in the top-right become available.
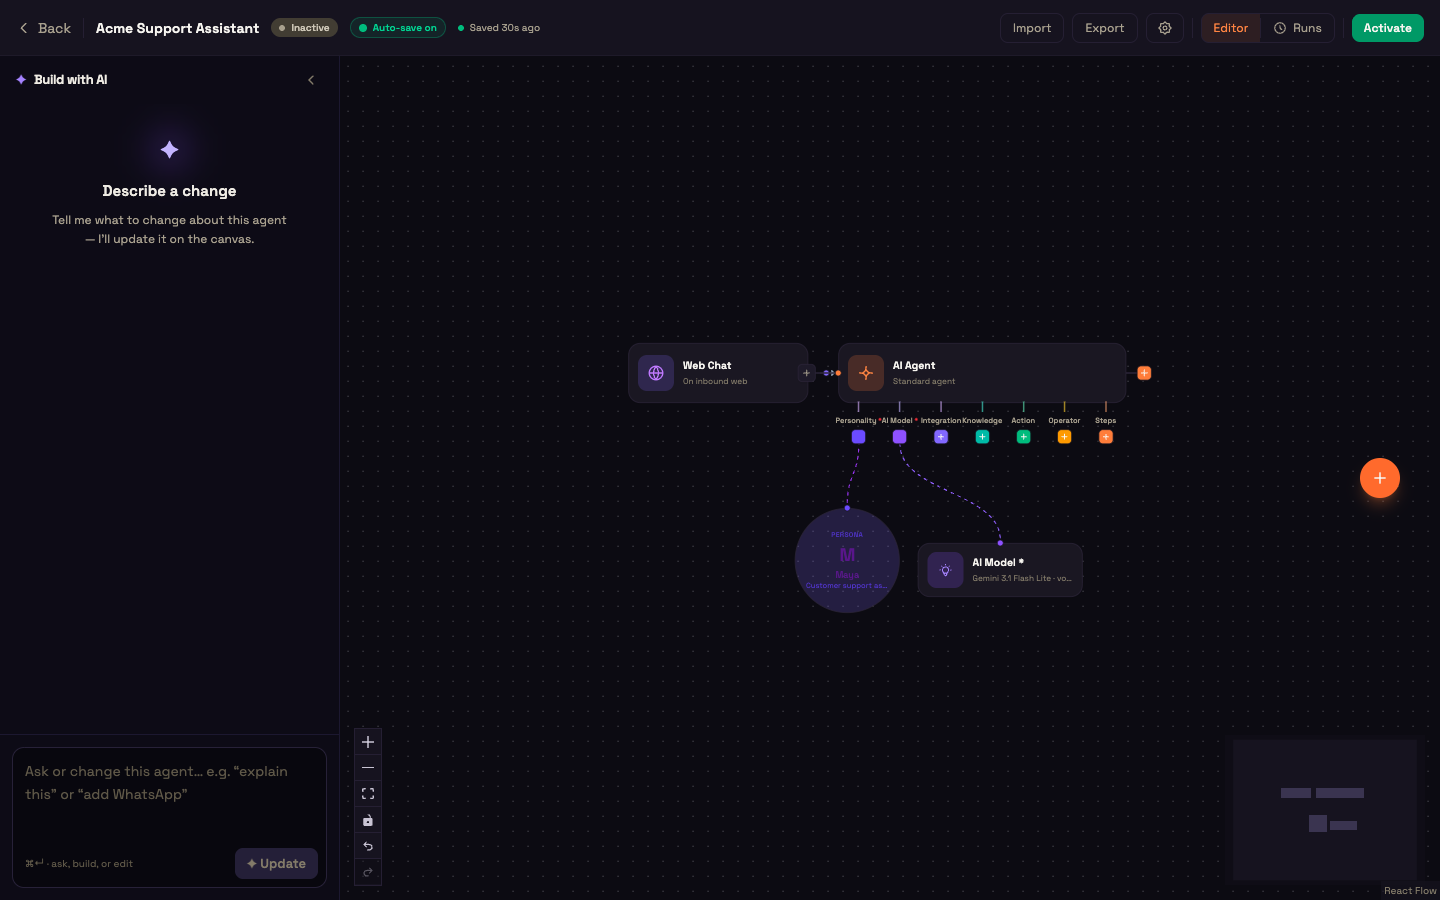
6. Talk to it, right inside Studio
Click the Web Chat node and, on its Configure tab, click Live preview. The same chat widget your visitors will see opens beside the settings, running your current draft. You don't need to activate first. Type "Hi, where's my order?" and press Enter.
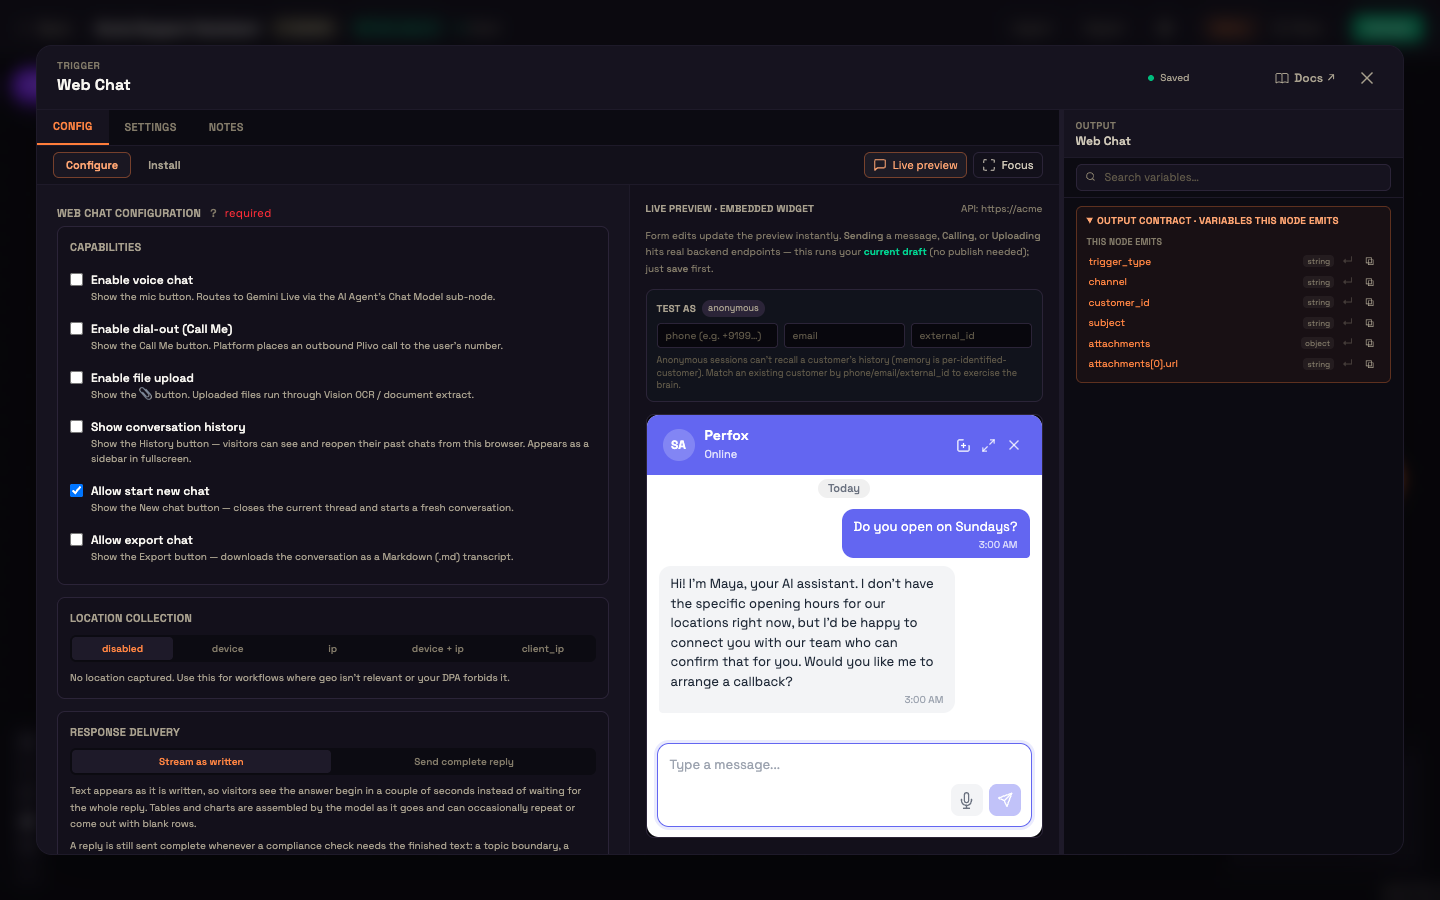
You should now see the agent reply in the personality you wrote: warm, brief, and offering to help. Tweak the system prompt and try again. That's the whole loop.
7. Take it live
In the top-right, click Activate. The status next to the agent's name flips from Inactive to Active, and the agent is now live for your website chat. (Changed your mind? Deactivate turns it off just as fast.) To put the chat bubble on your site, see step 9 of Getting Started.
What just happened. You built an agent as a small graph (a Web Chat trigger, an AI Agent, a Personality and an AI Model), tested it, and activated it. There was no code and no model to wire up. You described how the agent should behave, and Perfox ran it.
You did it
You now have a live agent with its own voice, and you know the core loop: assemble on the canvas → test in the Live preview → Activate. Every other capability hangs off this same shape.
- Give your agent a knowledge base → — answer from your documents instead of general knowledge.
- Take your agent live on WhatsApp → — reach customers on a channel they already use.
- Embed the widget on your site → — drop the chat onto any page with one script tag.