Take your agent live on WhatsApp
By the end of this tutorial your agent will answer real customers on WhatsApp from your own WhatsApp number, and you'll be able to confirm each reply actually reached them.
This is a hands-on lesson. It builds on the agent from Build your first agent, but the steps work for any agent.
What you'll build
A WhatsApp entry point and a WhatsApp sender, both wired to your agent and both using your own account, so a message to your business number gets an answer automatically.
Before you start
- An agent you can edit (from Build your first agent).
- A Plivo account with a WhatsApp-enabled number. Providers are bring-your-own: you connect your account once and Perfox uses it, so messages go out on your number and your bill.
1. Connect your provider
Go to Admin → Connections. Under Telephony & Messaging, find Plivo and click Connect. Enter your Plivo auth details, save, and click Test Connection to confirm it works.
Then point Plivo at your workspace. Expand the Plivo card: its setup panel lists the exact webhook addresses for your workspace, each with a Copy button and a note on where it goes in the Plivo console. For WhatsApp, paste the Inbound message URL and the Delivery Reports URL into your WhatsApp number's settings in Plivo. Where it's offered, Configure in Plivo does this for you in one click.
Why this matters. Because it's your account, numbers, delivery and costs stay under your control. If an agent ever needs a provider you haven't connected, Perfox tells you exactly which one is missing.
2. Add a WhatsApp trigger
Open your agent on the canvas. Click the orange + → Triggers → WhatsApp, and connect the new node to your AI Agent, the same way the Web Chat trigger is connected. Open the WhatsApp node and choose your number under Business contact. Messages to that number now start this agent. Optionally, use Include or Exclude to limit which senders it answers.
3. Let the agent reply: add a WhatsApp Sender
This step is easy to miss. On WhatsApp, SMS and email, the agent only replies when it has a sender for that channel. Without one, incoming messages still reach the agent, but nothing is sent back.
Click the + under the AI Agent's Action port and choose WhatsApp Sender (under Messaging). Open it and set:
- Send from: your WhatsApp business number (required).
- Send to: The person in this conversation.
- What to send: leave Message content on Let the AI write it.
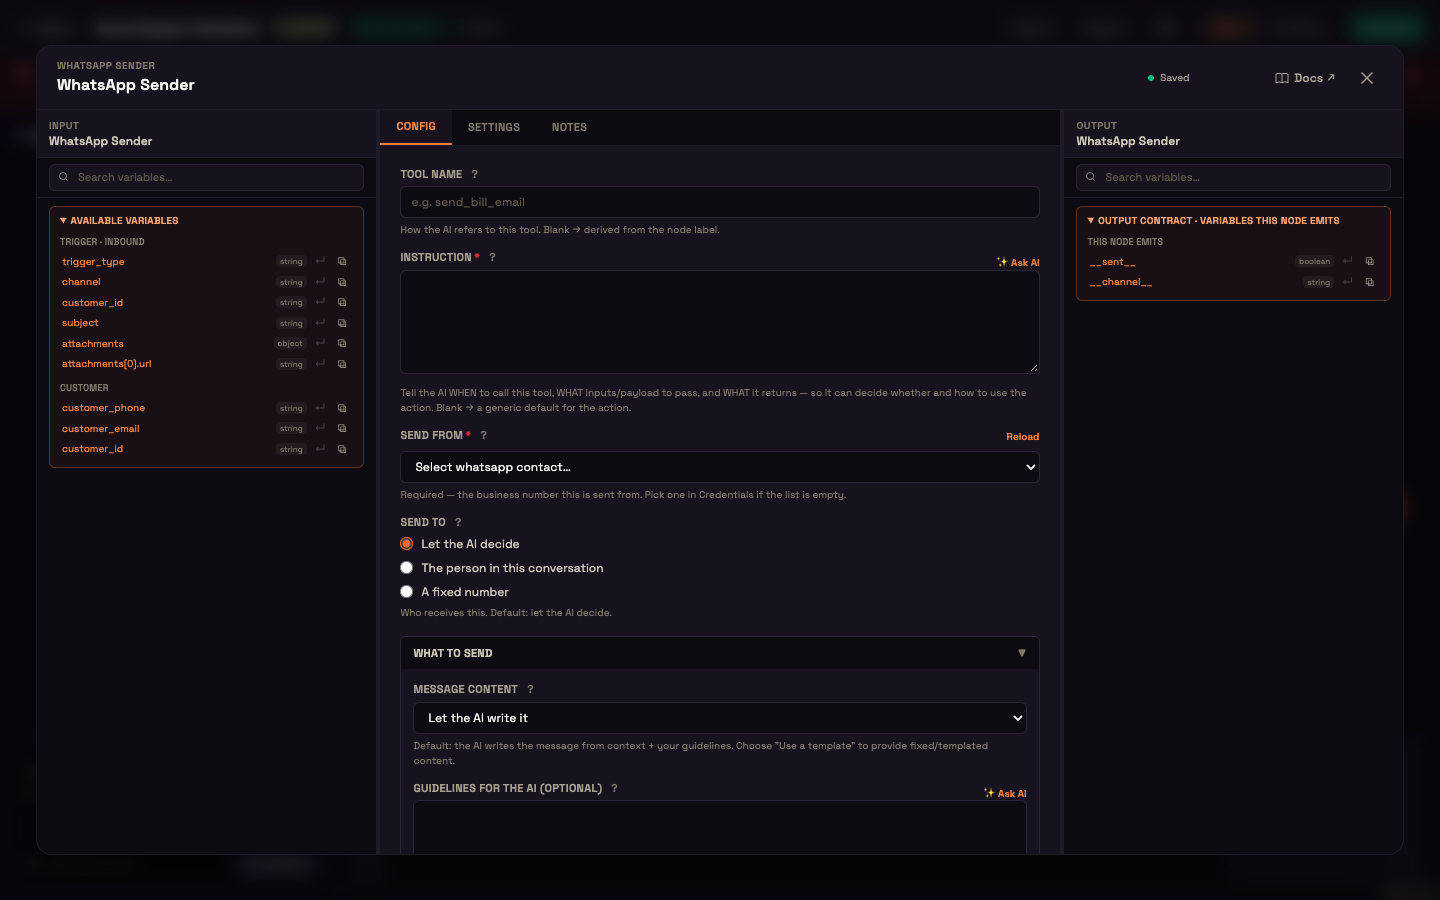
You should now see the WhatsApp Sender connected to the AI Agent's Action port, with no error badge.
4. Activate
Click Activate. The agent now answers on WhatsApp as well as web chat, with the same personality and knowledge.
5. Send a real message
From a phone, message your business WhatsApp number: "Hi, do you ship to Pune?"
You should now see your agent reply on WhatsApp within seconds, in the personality you set. If you gave it a knowledge base, the answer comes from your own documents.
6. Confirm it truly landed
Go to Engage → Conversations and open the exchange. Delivery is tracked end to end: queued → sent → delivered → read, or failed with a reason. If a message doesn't arrive, you see why (for example, insufficient credit on your Plivo account) instead of silence. If you forgot the WhatsApp Sender, the conversation shows the reply as not sent.
What just happened. The agent you built for web chat now serves WhatsApp with no rebuild. The trigger decides which number starts it, the sender lets it answer, and delivery tracking confirms the customer actually got the reply.
You did it
Your agent is live on a channel your customers already use, sending from your own number, with delivery you can check.
- Connect your own tools with MCP → — let the agent look things up and take actions, not just talk.
- Channels Overview → — how triggers and senders work on every channel.
- WhatsApp in depth → — numbers, templates and delivery reports.